Wash Down Pump
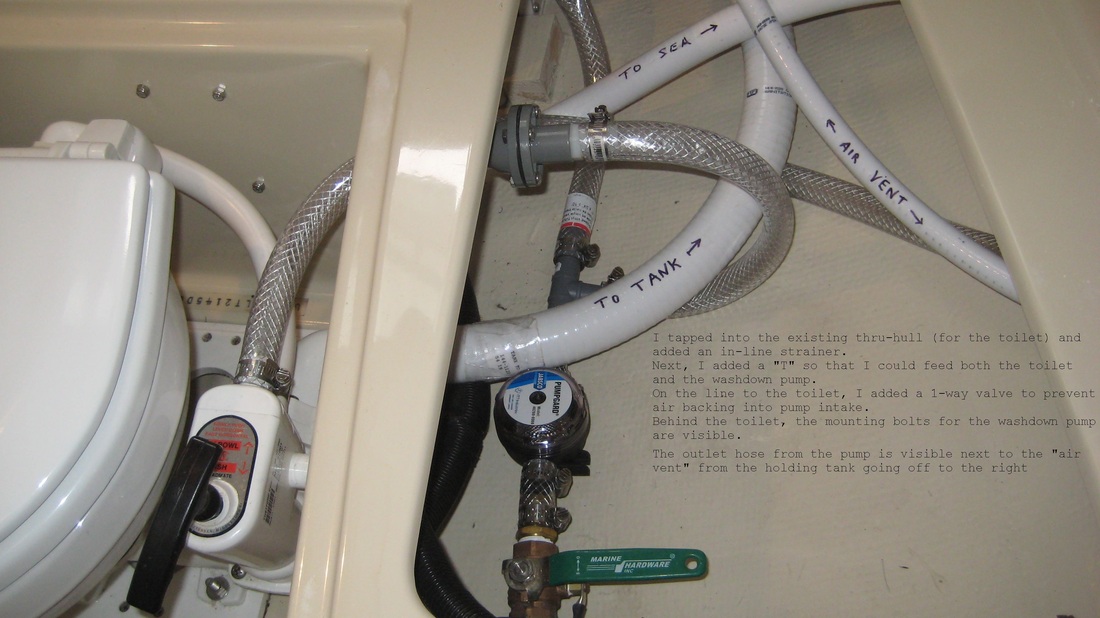
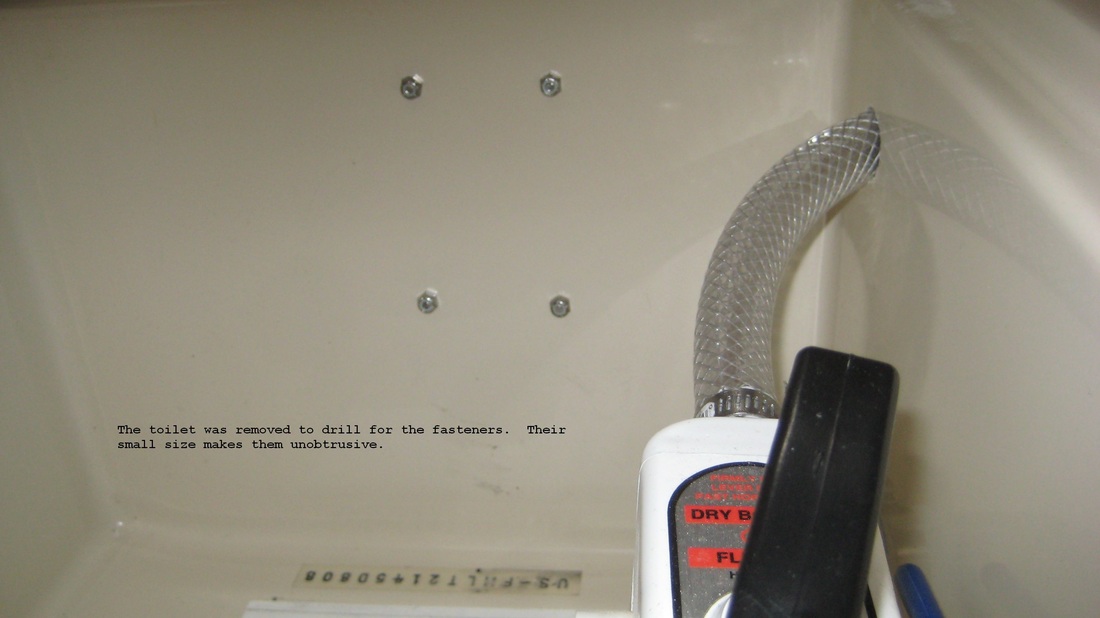
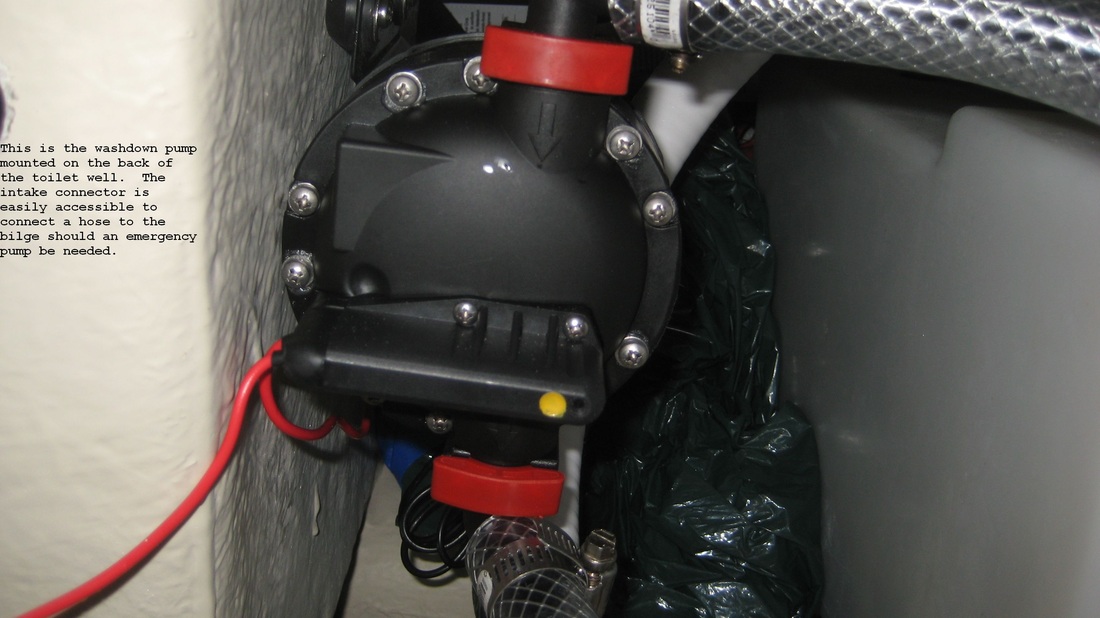
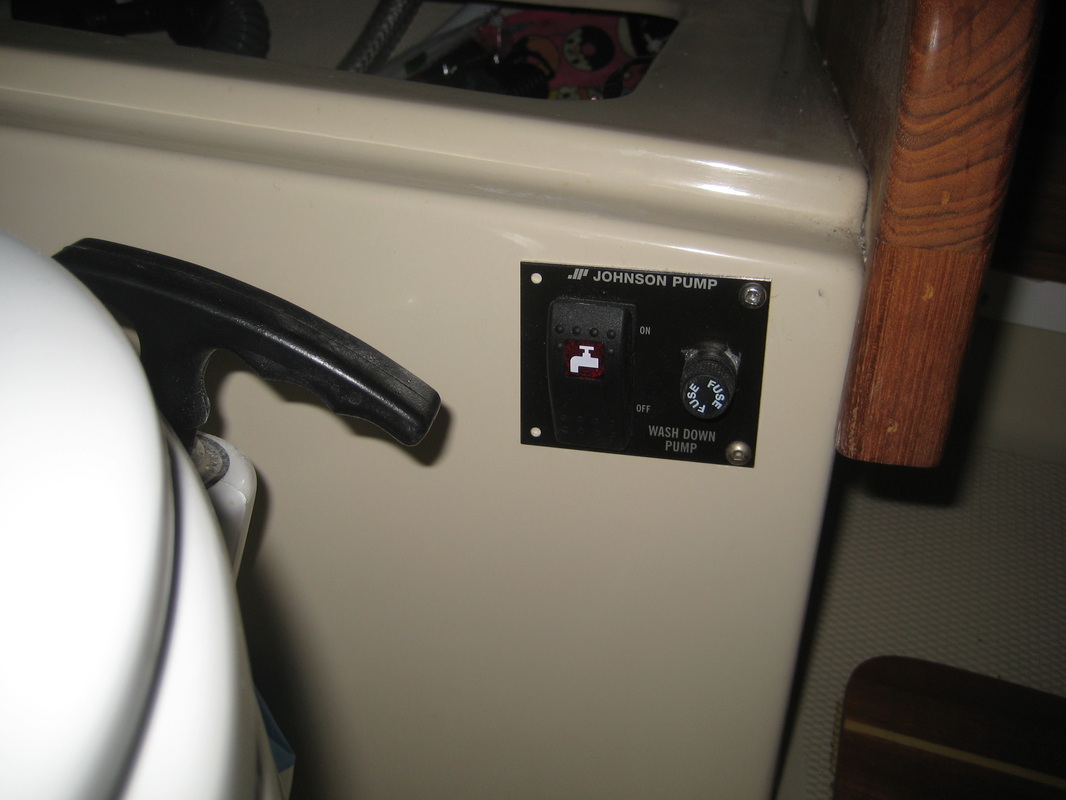
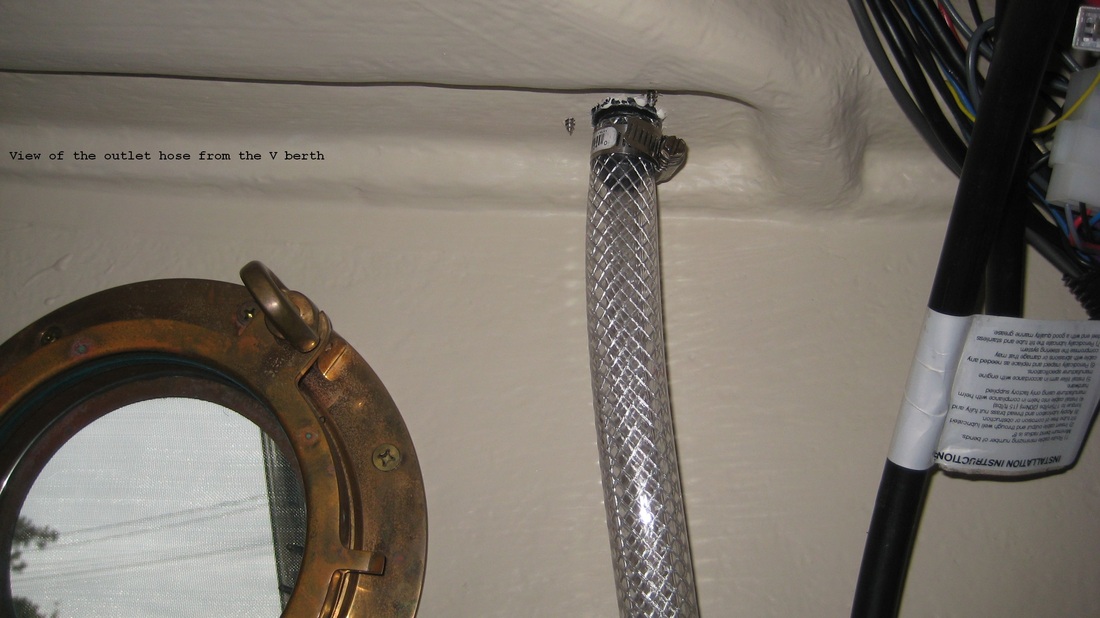
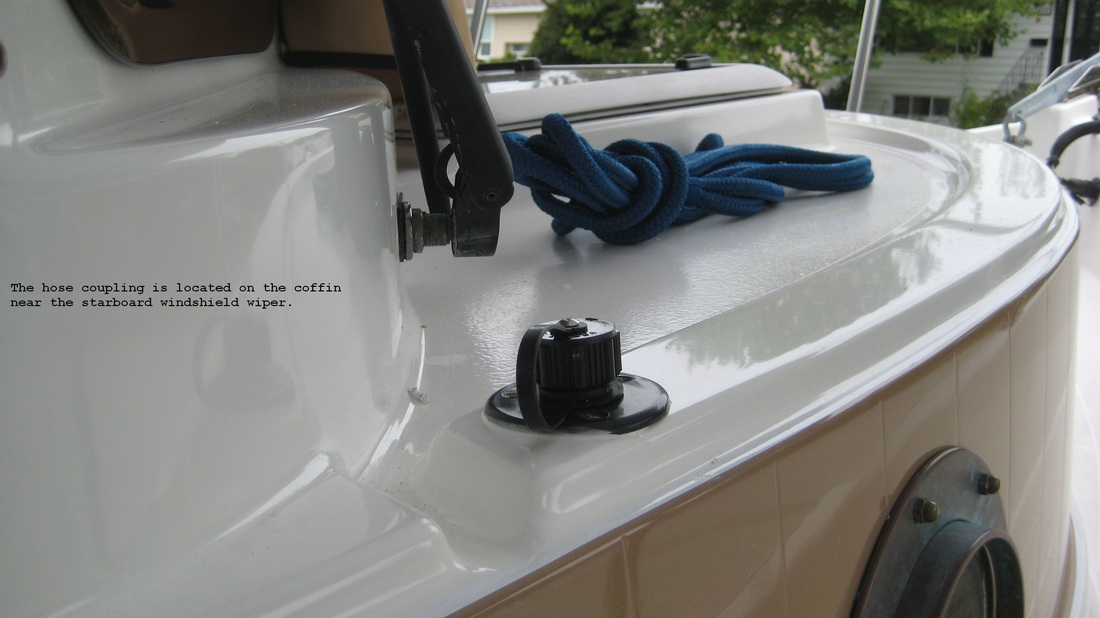
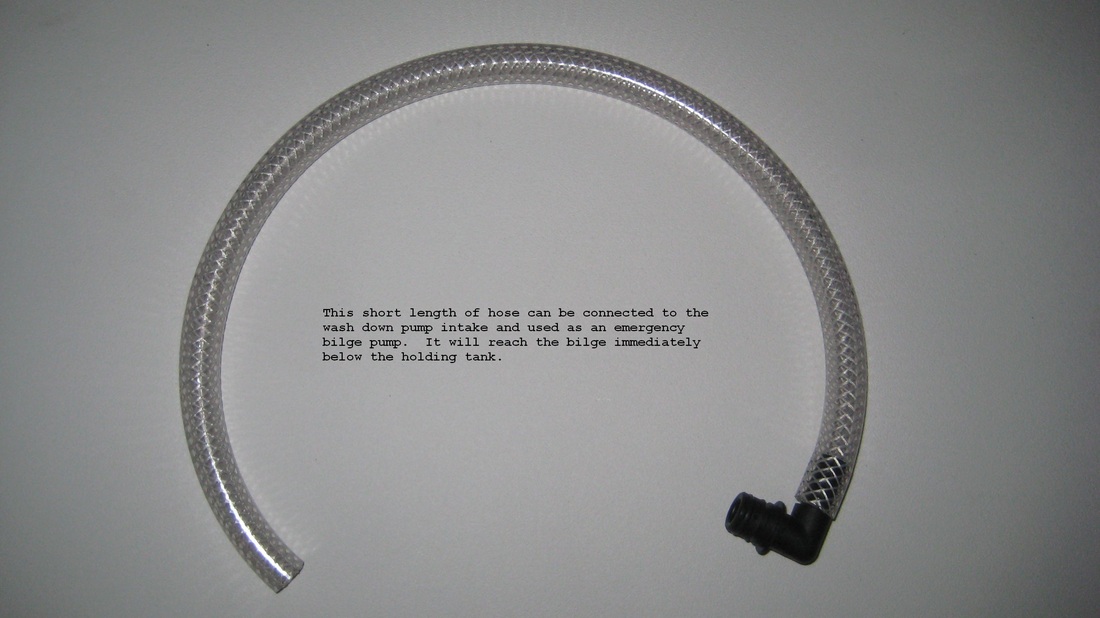
I chose to tap into the thru-hull for the toilet as recommended by the factory. I put in a sea-strainer to safeguard the pump and to reduce algae entering the septic system. Boating guru Don Casey says it causes odors. The "T" feeds water to the toilet via an anti-syphon valve and to the washdown pump which I located forward of the toilet well. The outlet hose runs behind the starboard side cushion and up to the deck near the starboard windshield wiper. I mounted the fused switch in the toilet well and accessed power at the main bus located under the throttle control. The inlet side of the pump lies on top and easily accessible to attach a hose that can be used to drain the bilge should there be a bilge pump failure. The quick-snap connections make the switchover easy and I keep the hose and fitting nearby. For winterizing, this same hose can be placed into a jug of anti-freeze and the system can be purged. Pump came courtesy of Ranger Tugs at the 2011 TugFest and RDragon crew who actually won the prize. Components I had to buy cost $150
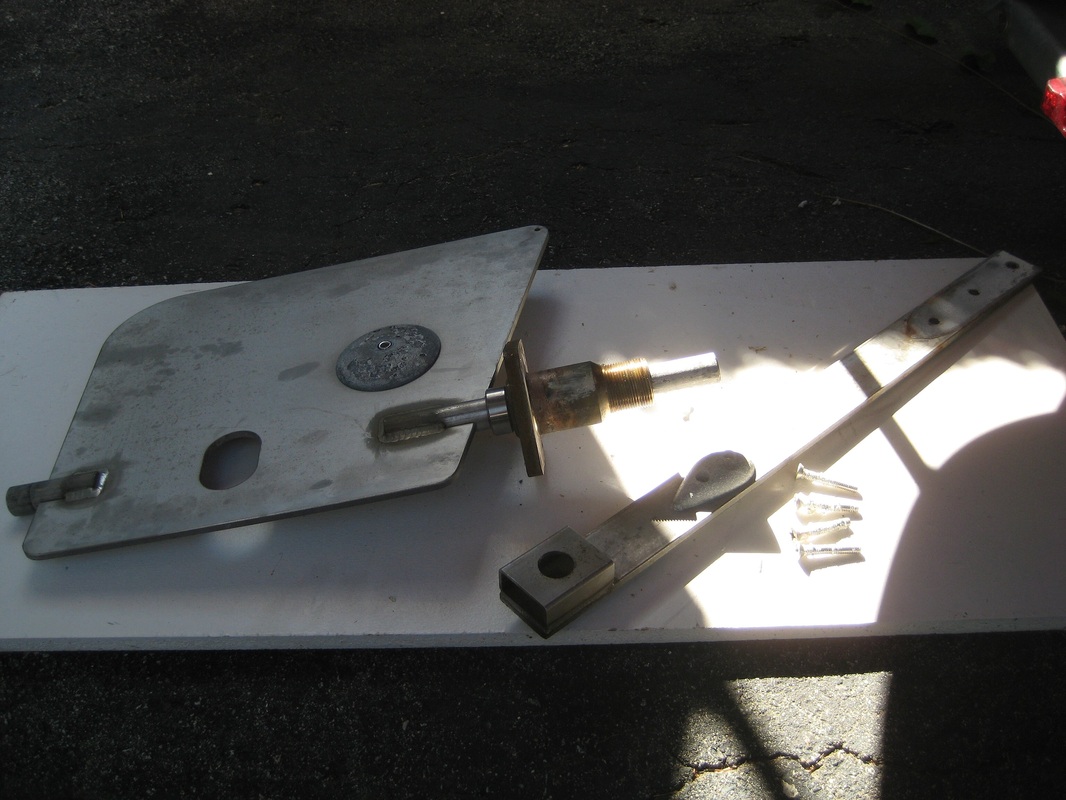
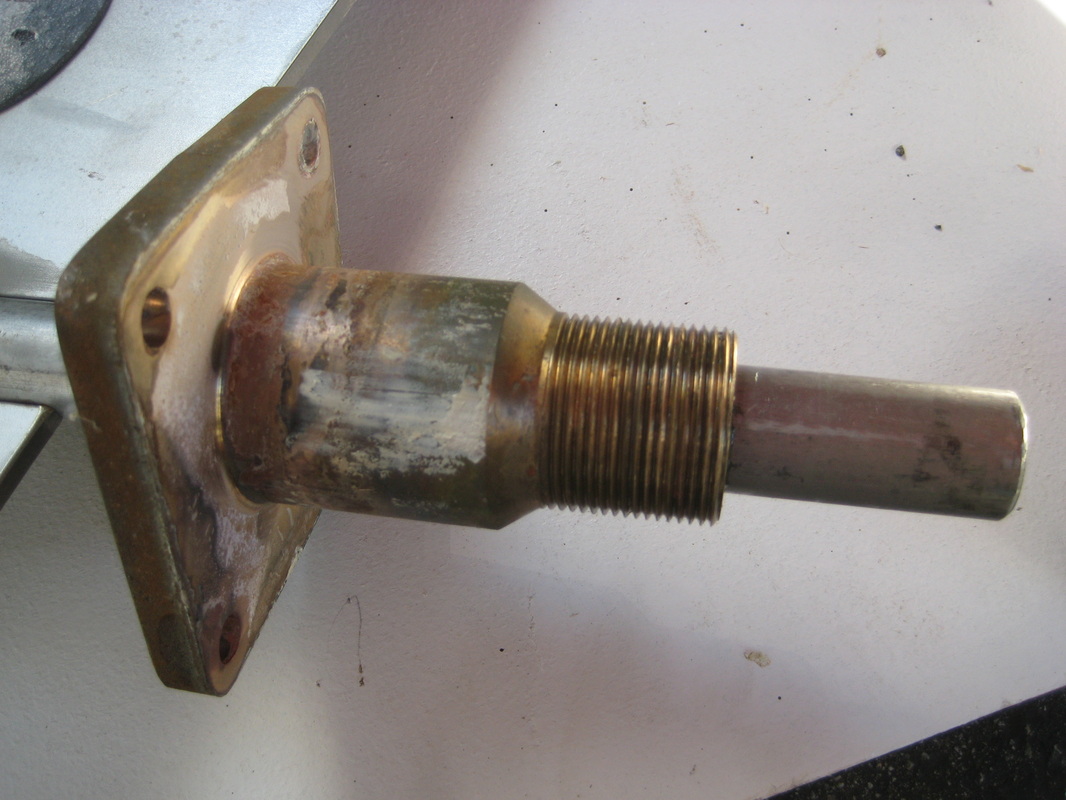
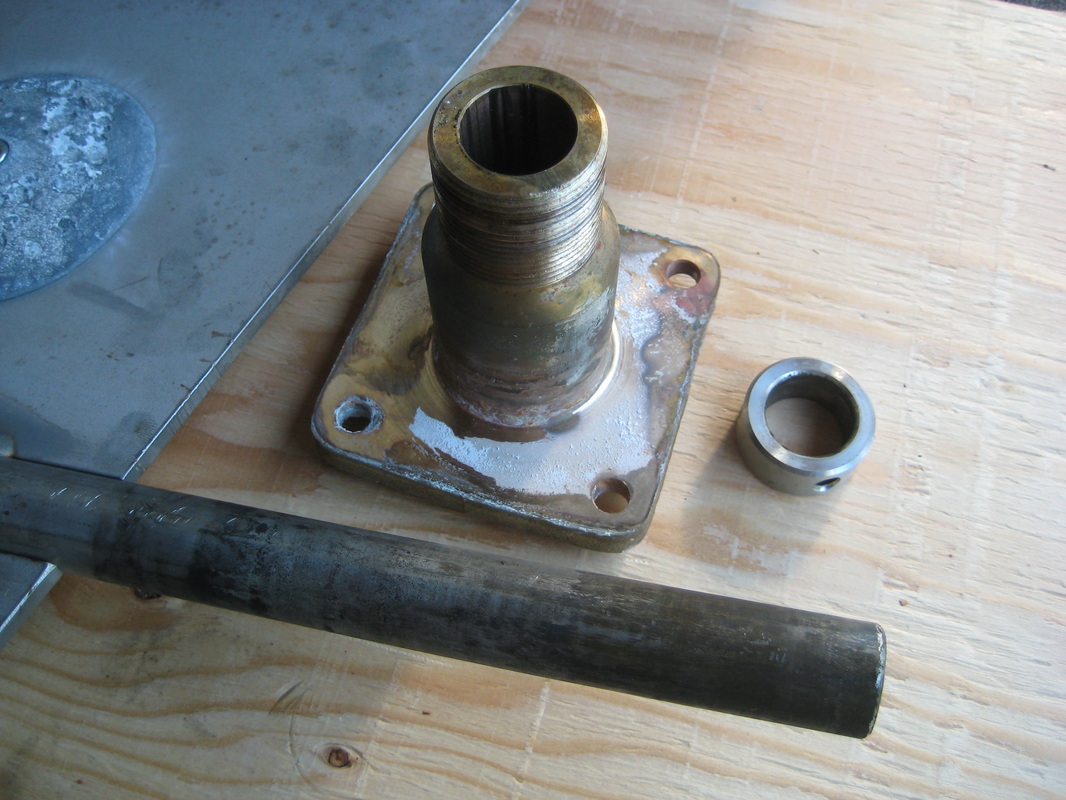
Seized Rudder
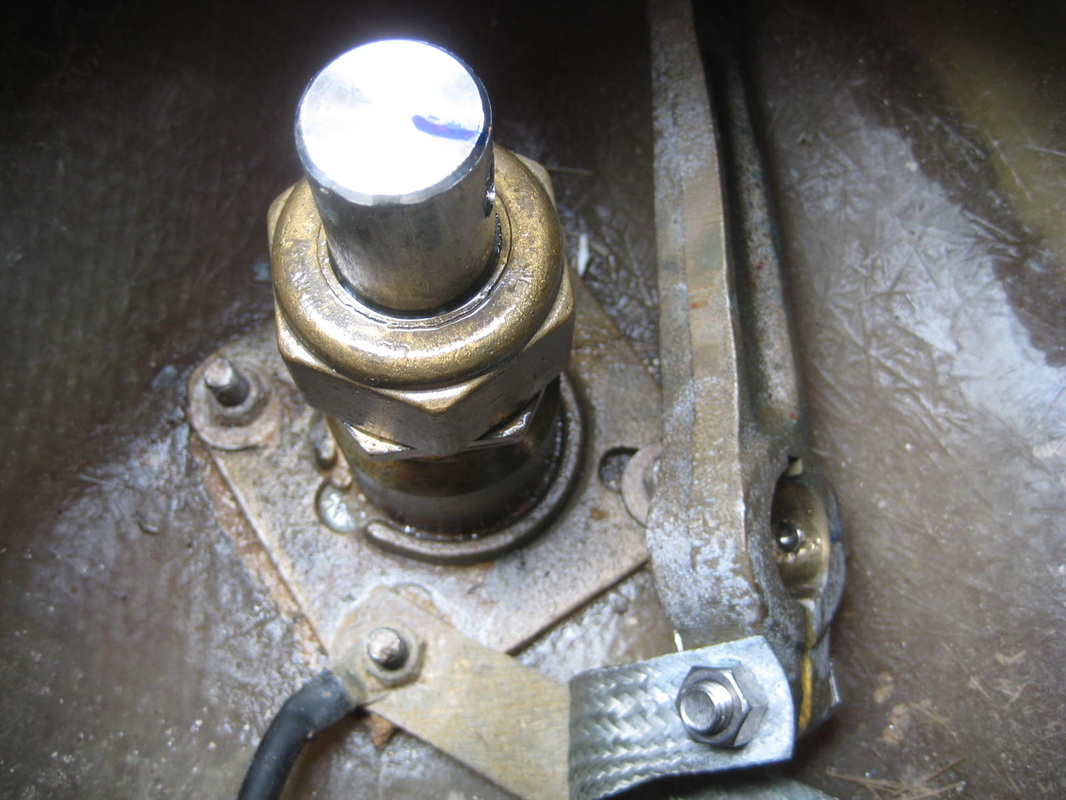
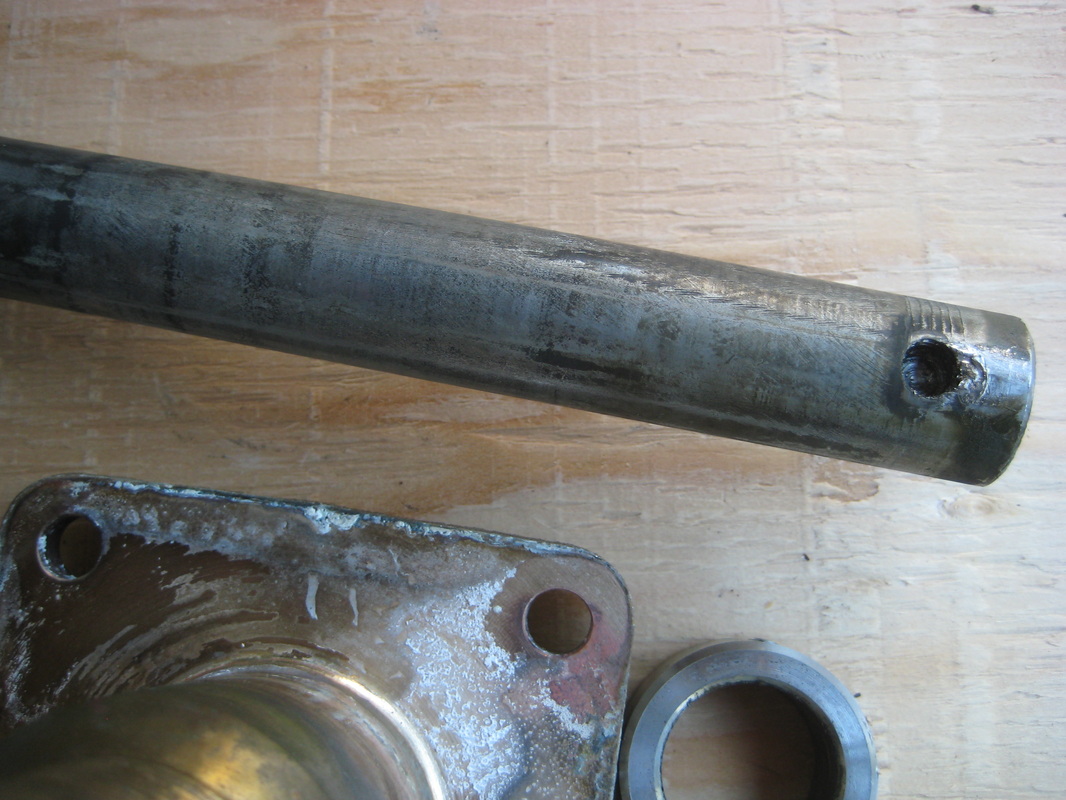
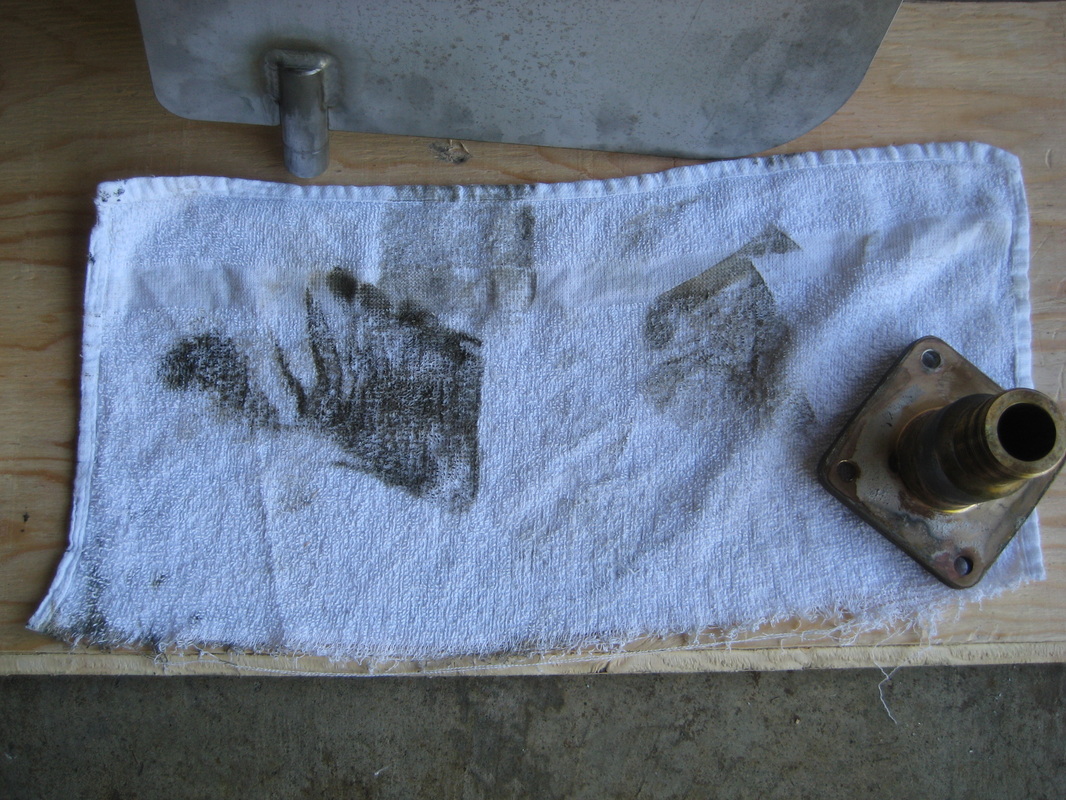
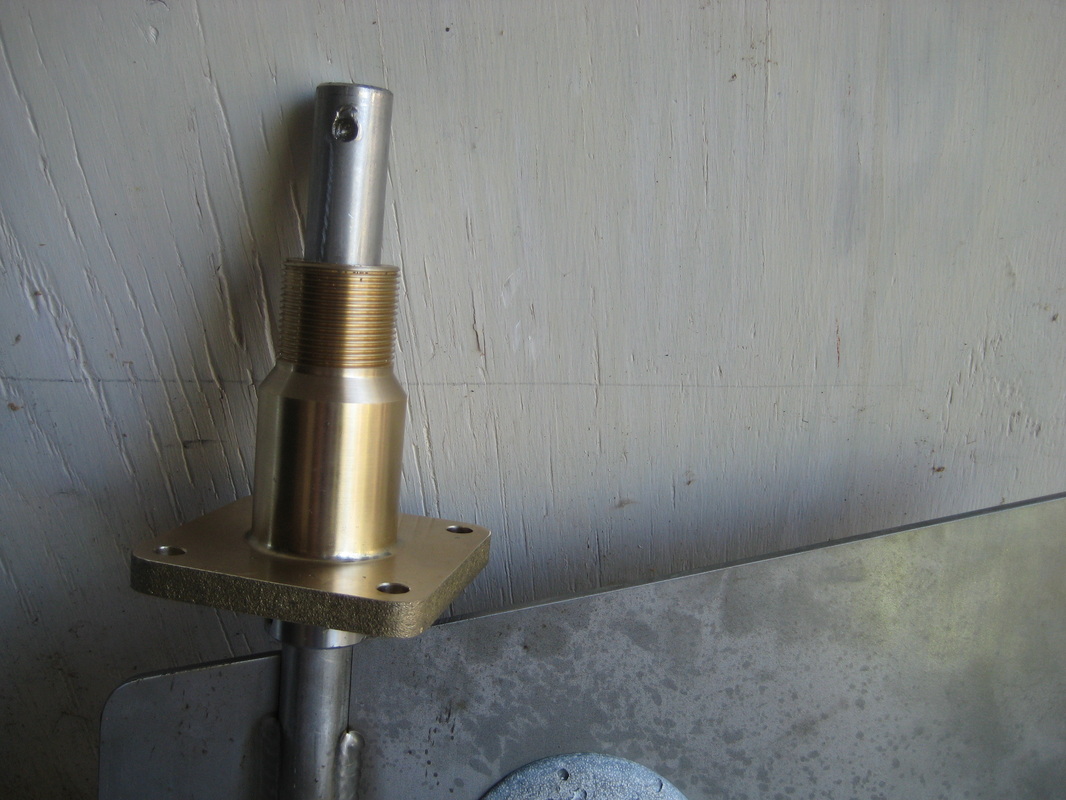
When it became impossibly stiff to steer, I narrowed down the problem to a tight rudder collar by disconnecting the steering linkage, the packing nut and checking the contact point of the rudder on the skeg . I removed the components from the boat (rudder and skeg). I then had to hammer the old collar off the shaft, a task that took 15 minutes. The new collar, once installed, spins freely. I then re-installed all the components using a good 3M sealant. It was clear that there was no corrosion and very little debris buildup (see rag in photo). I deduced that the old collar's tolerance must be out. I returned it to the manufacturer, but got no response. Cost: $300
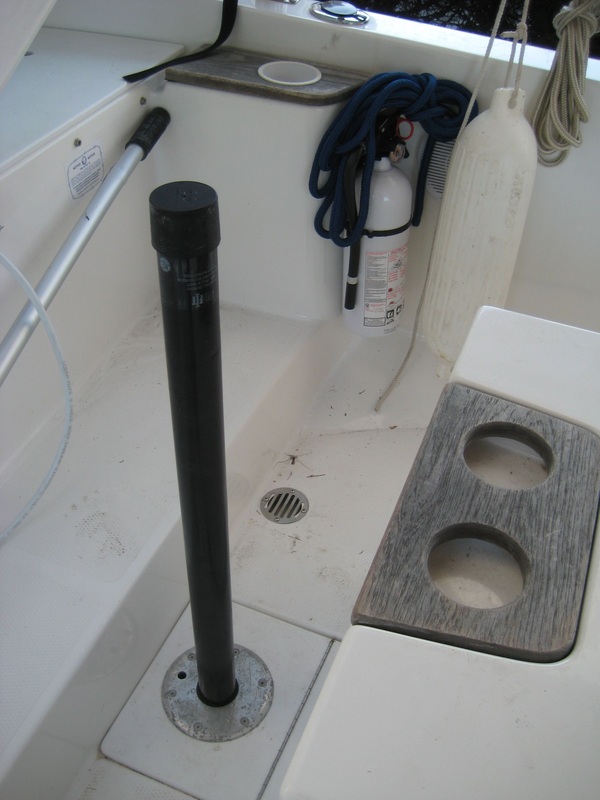
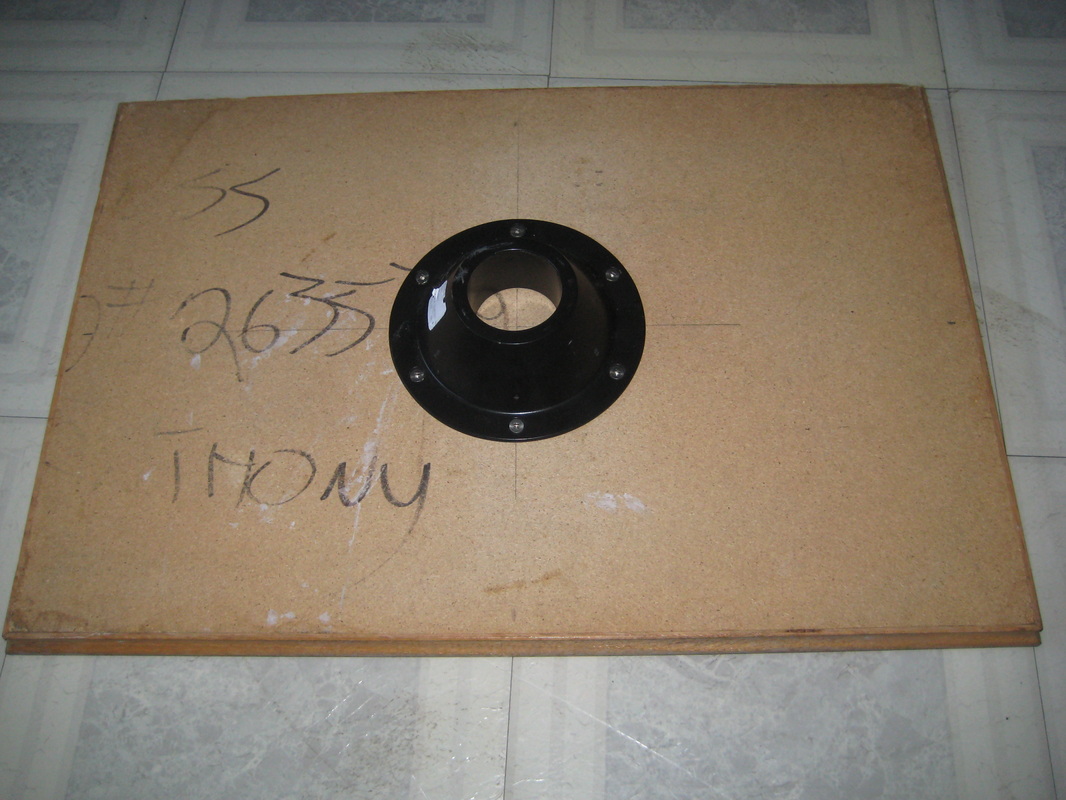
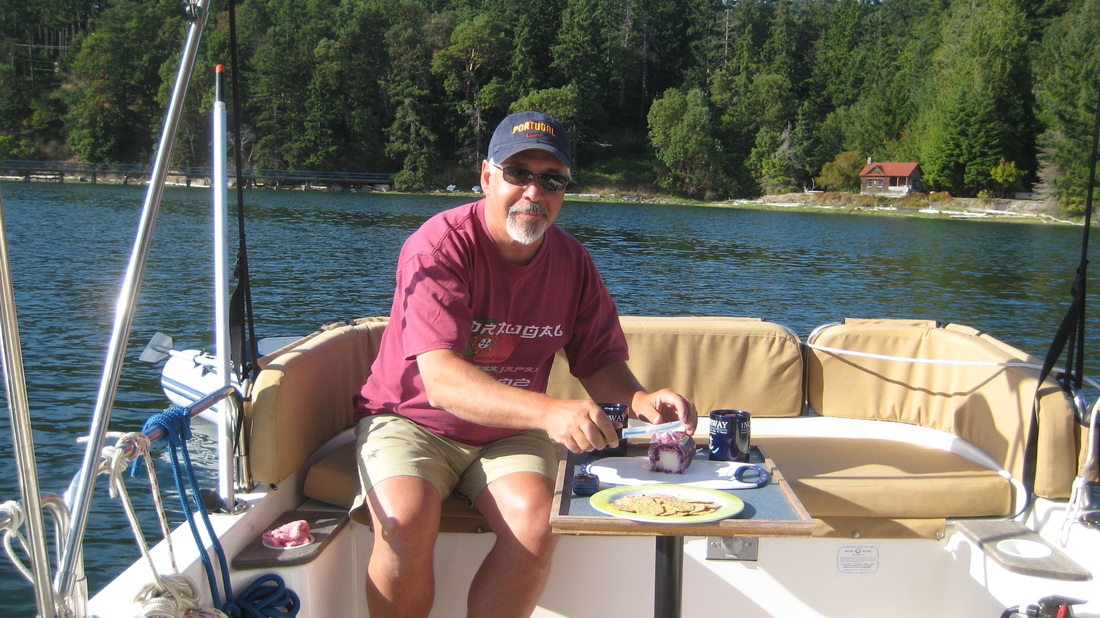
Cockpit Table
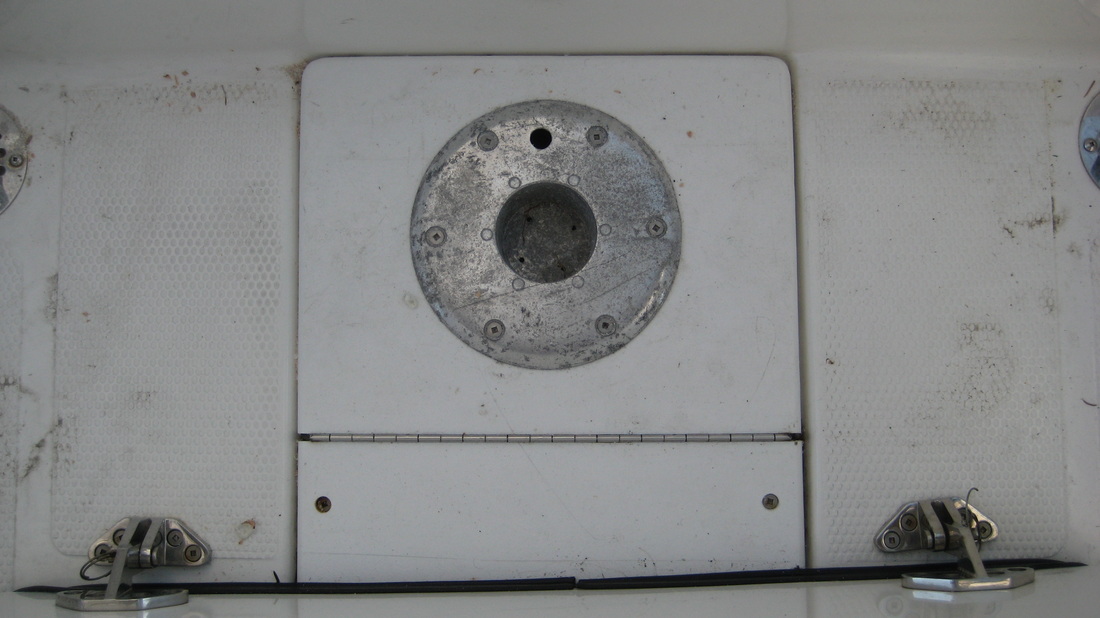
A sit-down meal is awkward aboard the R21. I installed a small table in the cockpit which used RV fittings and can be dismantled when not in use. I placed the bottom receiver into the bilge inspection plate and the pedestal inserts into this. I had to install a slide bolt so that the table doesn't tilt unexpectedly. The table has a receiver installed on the underside that marries with the pedestal. Now plates don't have to be placed on cushions and risk a messy spill. "Happy Hour" is a more elegant affair. Cost: $150 [Revisit: I noticed at the 2013 Vancouver Boat Show that the factory now offers a table at this location. It is beautiful but I noticed these deficits: The diagonal support located on the engine box both requires re-enforcing of the box and makes it difficult for the person using the engine box as a seat to slide in and out. The re-enforcing is an extra task for the do-it-yourselfer who is retrofitting the boat. The other thing the factory table lacks is raised edges. Edges are very useful.]
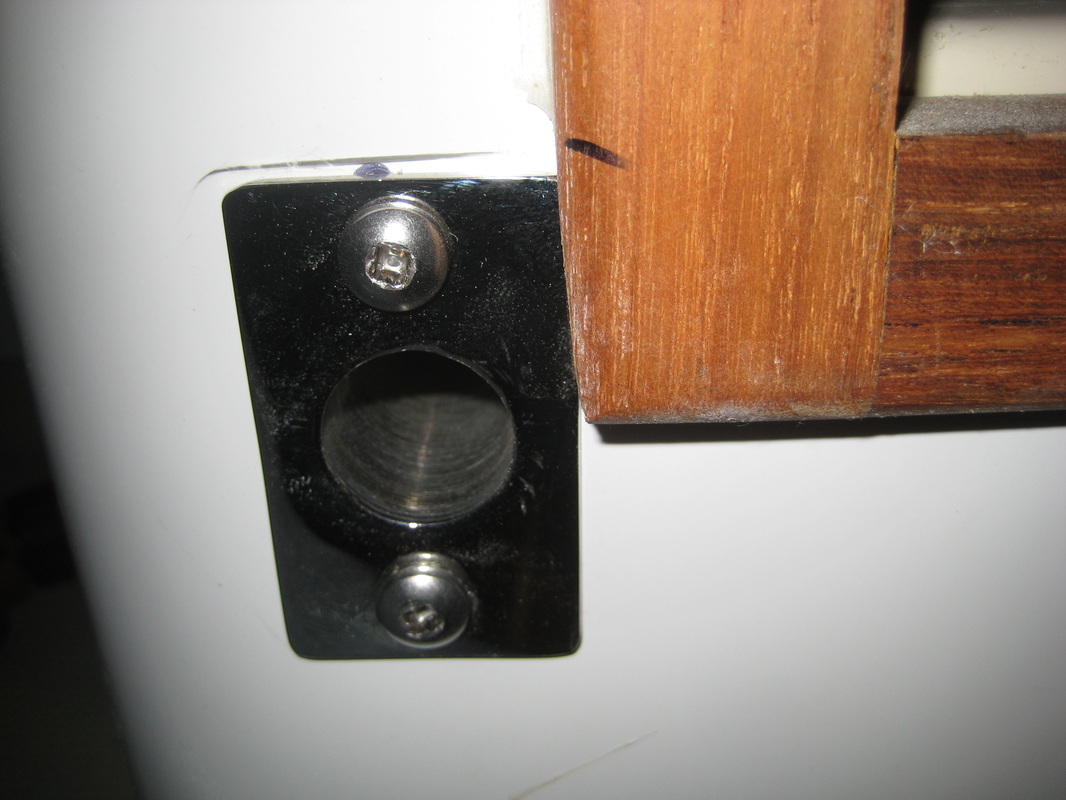
Passenger Foot Rest
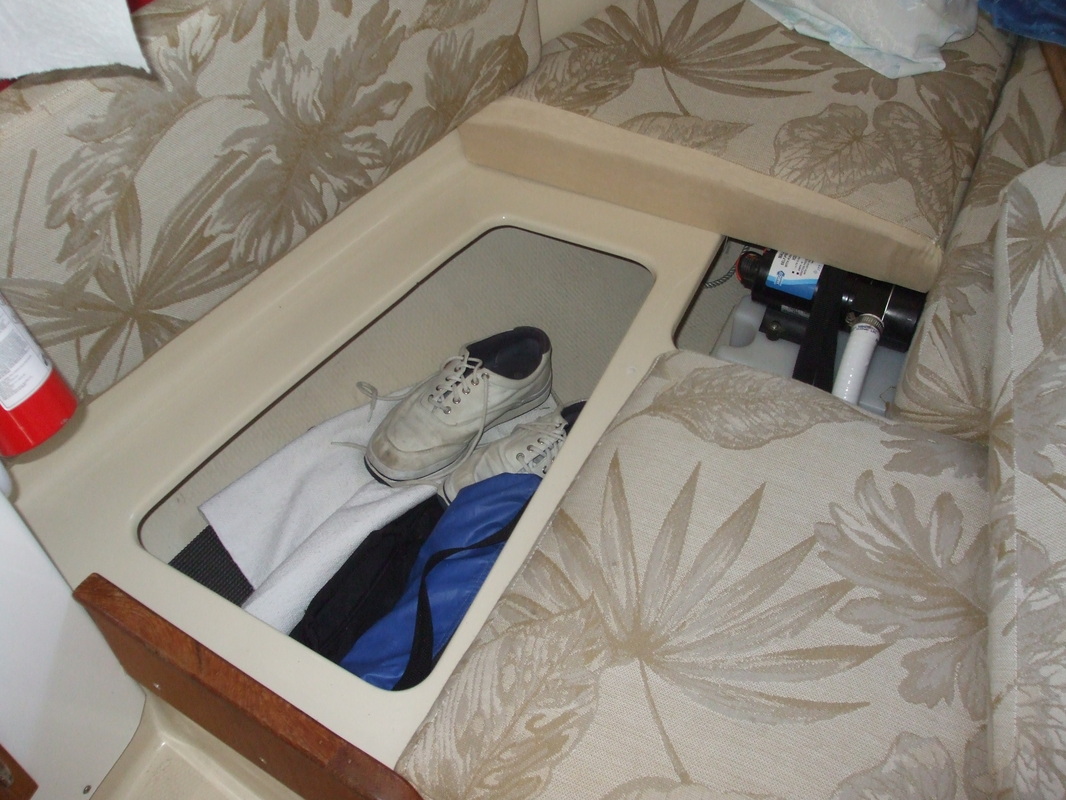
I installed an after-market foot rest on the passenger side of the Port Nut. I put it low enough that the cupboard door would still open but high enough to enable the passenger to boost herself onto the passenger seat. The receiver for the footrest intruded into the compartment where the fresh water reservoir is located. I removed the compartment cover so that I could visualize the space I would be drilling into and noticed that the water tank was slanted toward midships like the contour of the hull it rests on. This put the water outlet (on the outboard side of the tank) "uphill", resulting in a significant amount of water being inaccessible; perhaps a gallon. This means not all water is used when the tank runs "dry" and the tank will not be fully emptied for winterizing. With some difficulty, I managed to slide a block under the tank and to nearly level it. I could not get it perfect as the hoses could not be uncoupled without cutting them away and buying replacements. Photos illustrate the water tank situation and the installed foot rest.
Later, it was found that although the lower position works well for assisting the passenger to get on & off the seat, it is not as comfortable as a foot rest while enroute. A second set of receivers located further up covers this requirement as the foot rest can now be moved to the higher setting which I happily do whenever the Admiral is ensconced in her seat. This also enables the helmsman to twist sideways and rest a foot on the footrest. Cost: $125
Later, it was found that although the lower position works well for assisting the passenger to get on & off the seat, it is not as comfortable as a foot rest while enroute. A second set of receivers located further up covers this requirement as the foot rest can now be moved to the higher setting which I happily do whenever the Admiral is ensconced in her seat. This also enables the helmsman to twist sideways and rest a foot on the footrest. Cost: $125
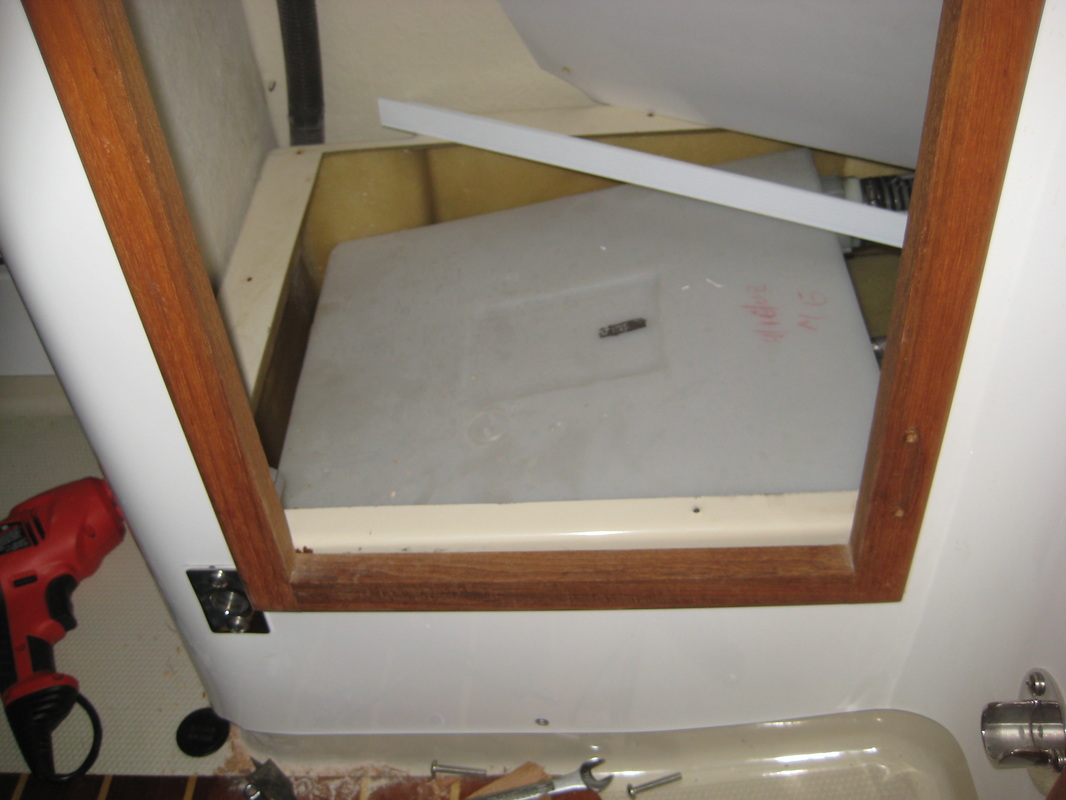
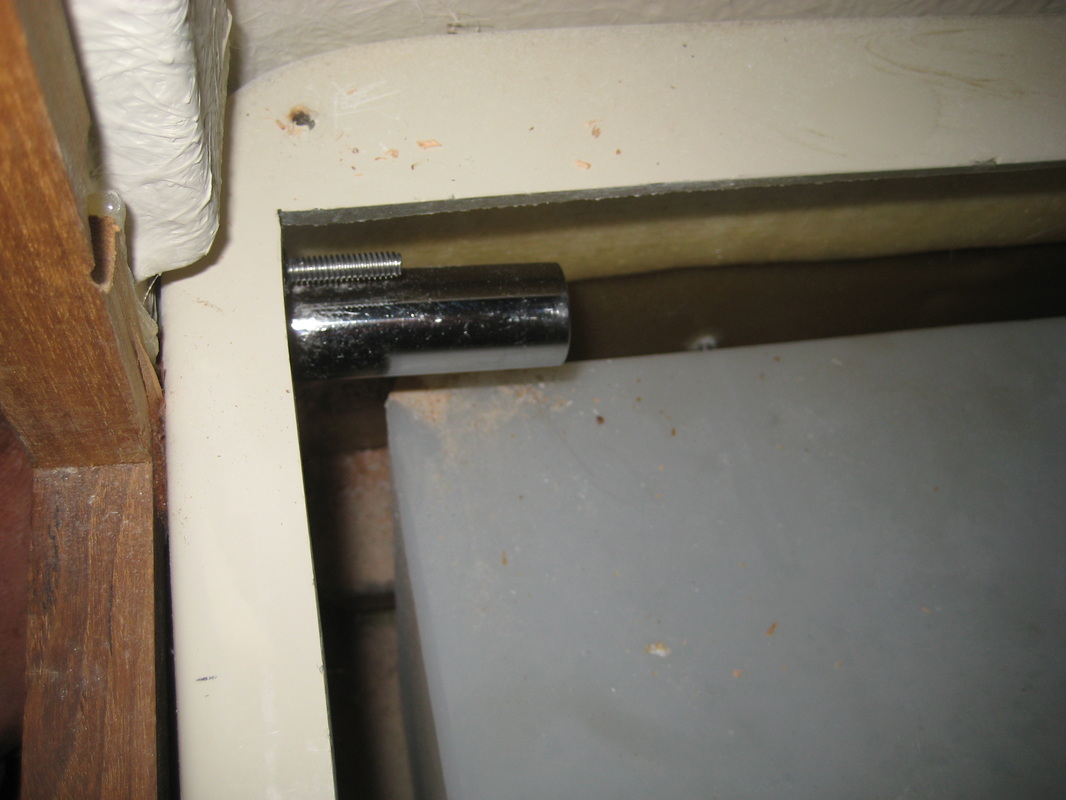
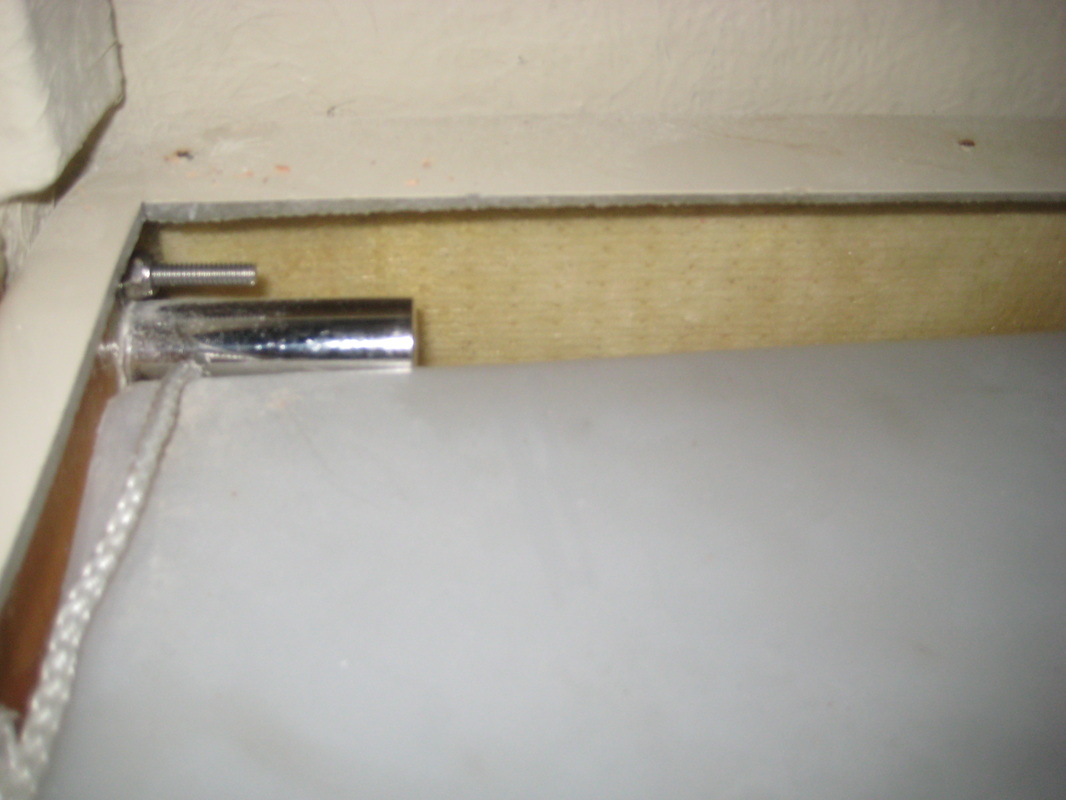
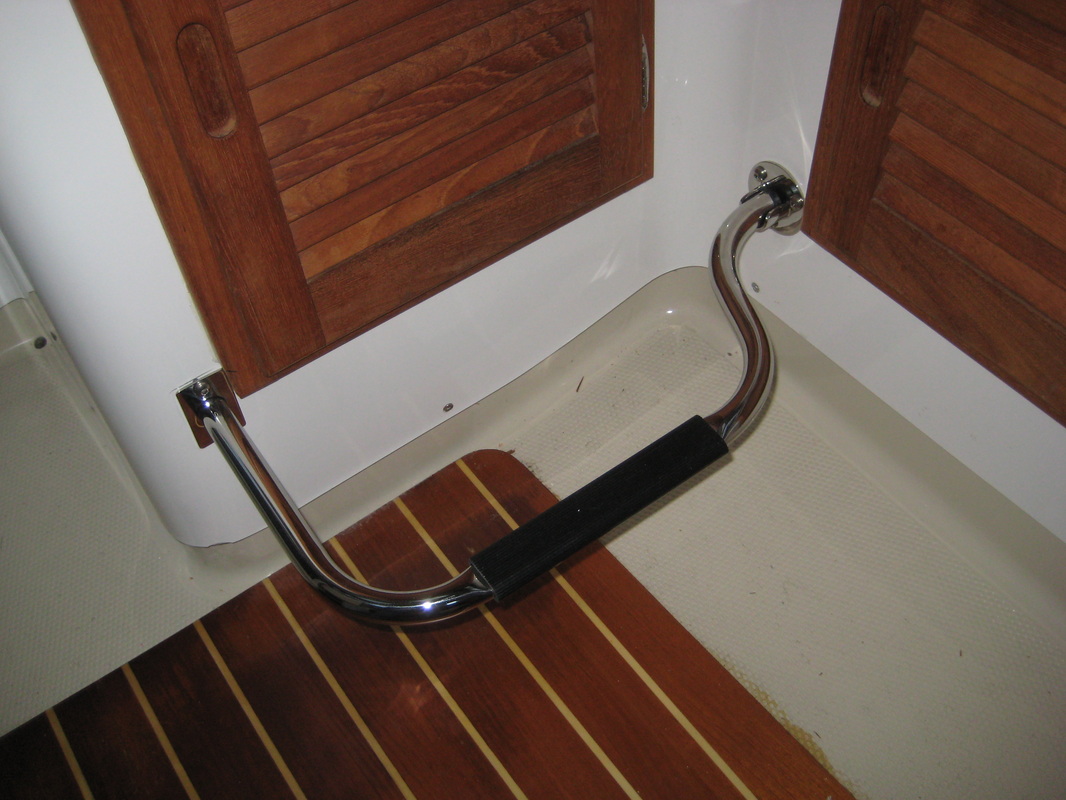
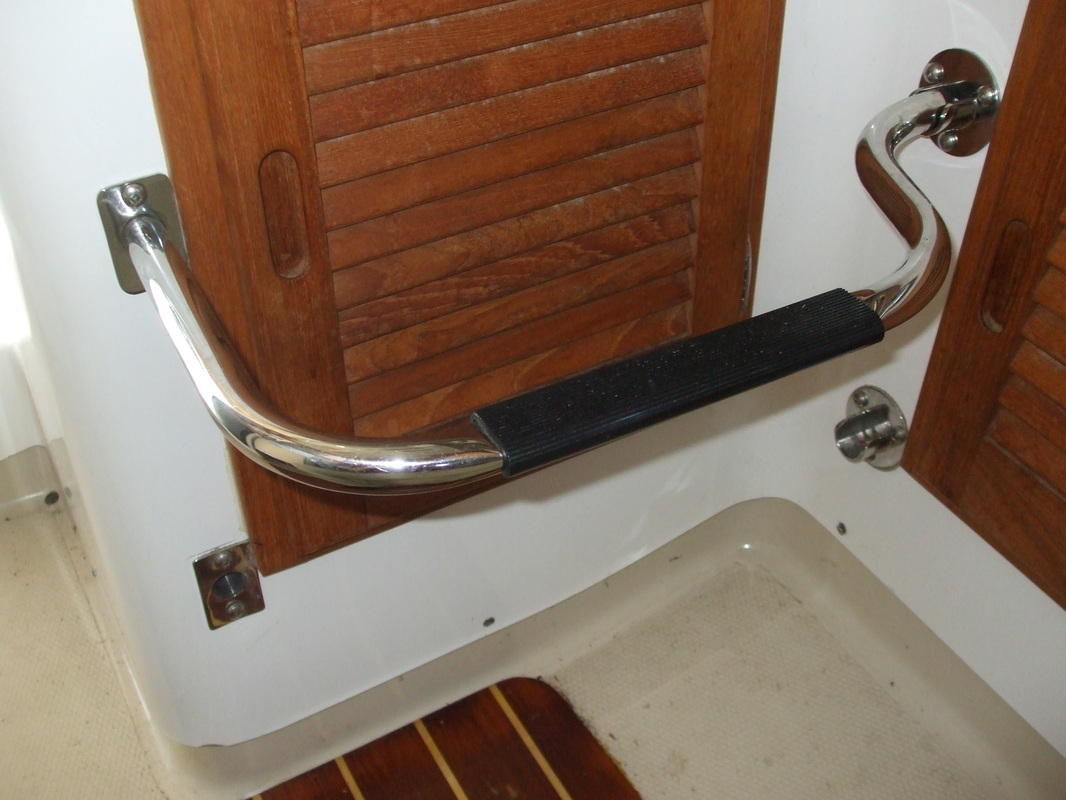
Photos 1 to 4 show the position of the lower receiver and the water tank slanted. Photos 5 & 6 show the foot rest High and Low locations.
Replacement Mast
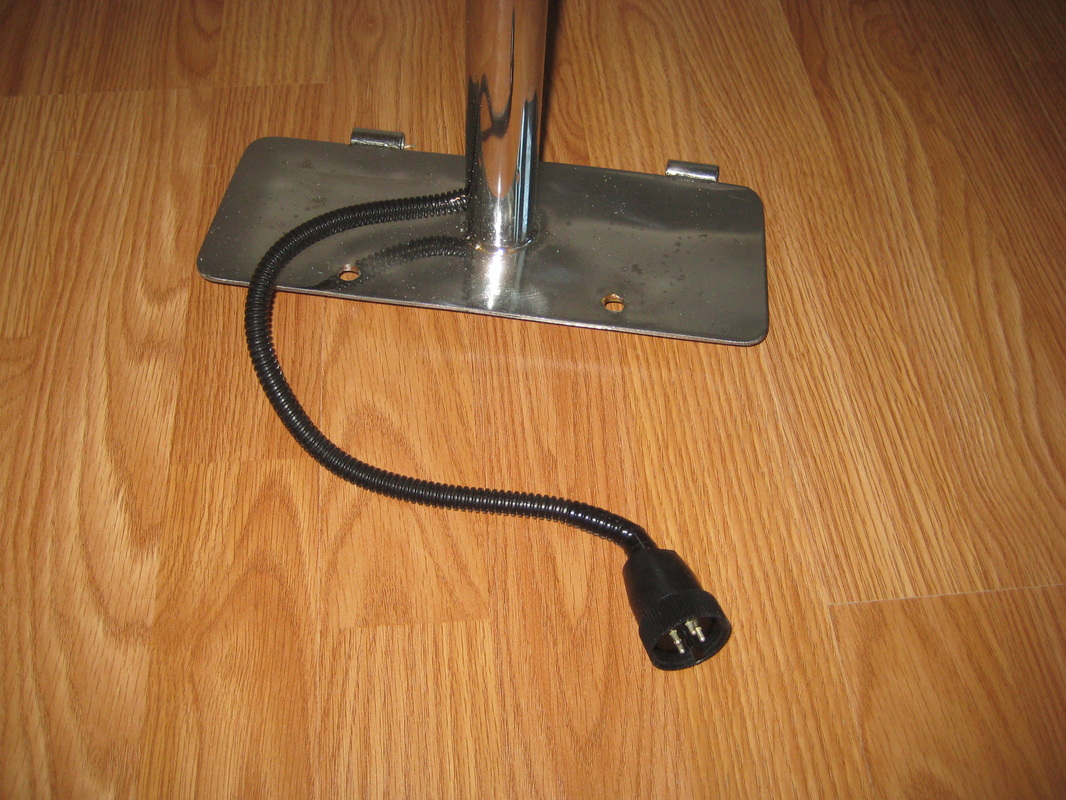
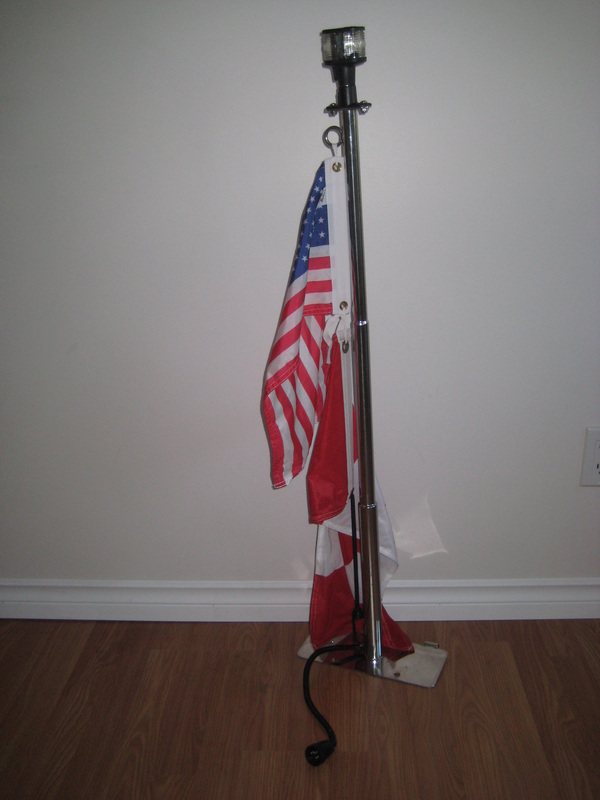
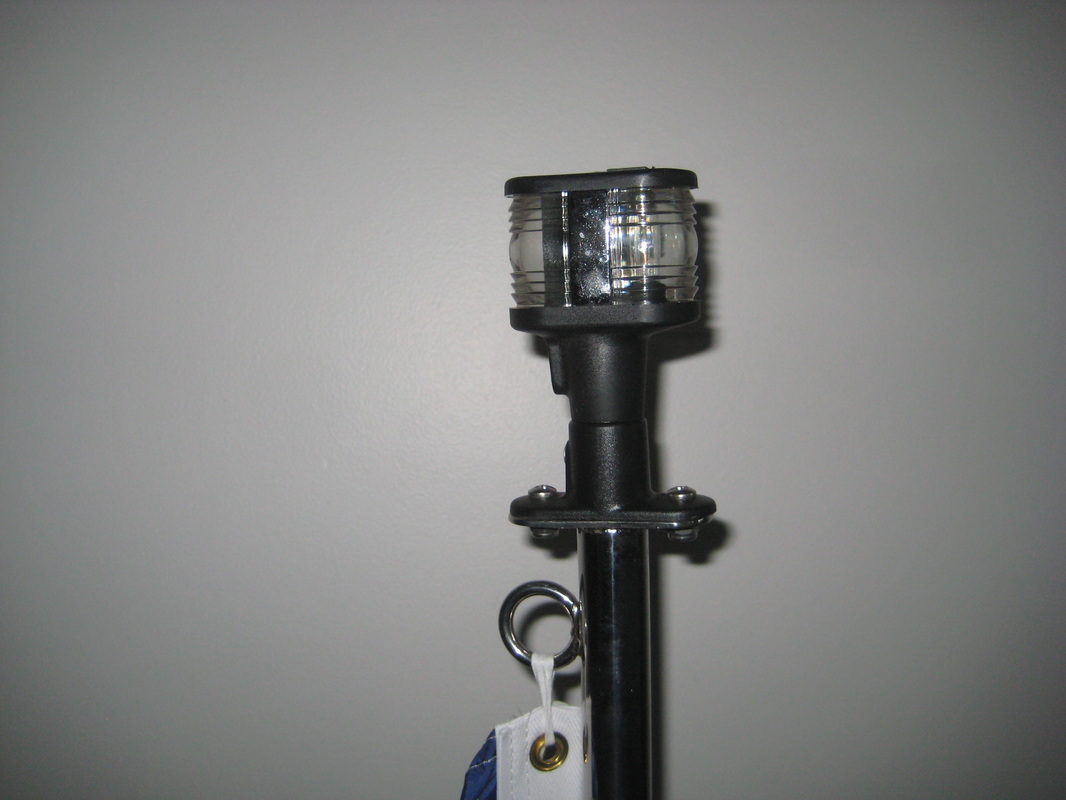
I found the factory mast to be too cumbersome and heavy. It is removed at home so that the boat fits under a storage canopy. Pre-launch, I can install the mast while the boat is on the hard, but must leave it in the folded-down position to go under a bridge after launching. After the bridge, I would hang on precariously to raise it and feared falling into the water. My solution was to have Bolton Stainless of Vernon, BC, the makers of the original masts, build a smaller one that would still have an anchor/nav light and be able to hold a flag. It has a telescopic aspect and a very robust anchor light mounted on top. The wiring was easy and ends in a connector like the original. Most importantly, I can now raise it easily and secure it with one hand while the other hand remains "for the boat." Cost $250
V-Berth Cushion Upgrade
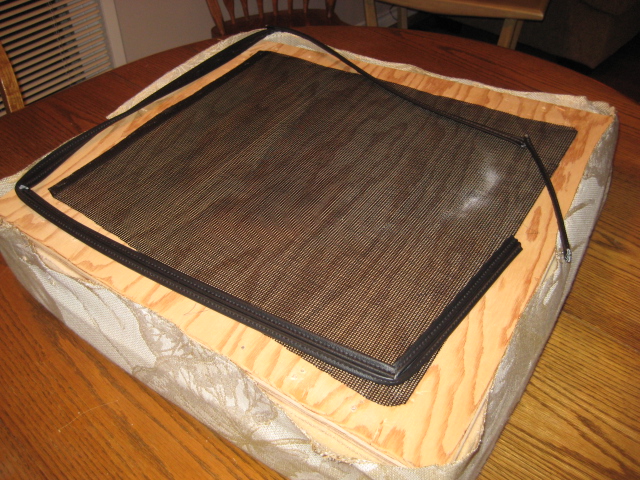
I found it challenging when, during the day, I tried to access the under-cushion storage due to bedding and other objects being stored on the berth. All the bulky material made lifting the long cushions difficult. It was necessary to move everything to one side so that the cushion could be lifted. Since most of my daily access was to the port side storage, I opted to cut that cushion in two so that a smaller portion could easily be lifted without having to move a lot of objects.
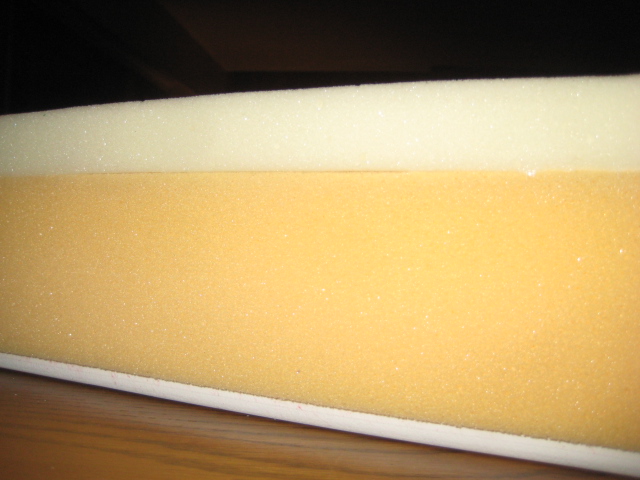
The first task was to remove the upholstery from the cushion. Then I had a brilliant thought: Why not add some memory foam so that my sleep will be more comfortable (I am not the first one to have noticed that these cushions get rather hard by the end of the night)? I then removed the upholstery from all three factory-original cushions and had 1 inch of memory foam laminated onto the existing foam. Lamination is necessary so that the foam will not migrate. I will be criticized for not adding 2 inches, but I wanted to keep costs down and also retain adequate foot room in the narrow space at the bow. The lesser thickness enabled me to re-use the original fabric.
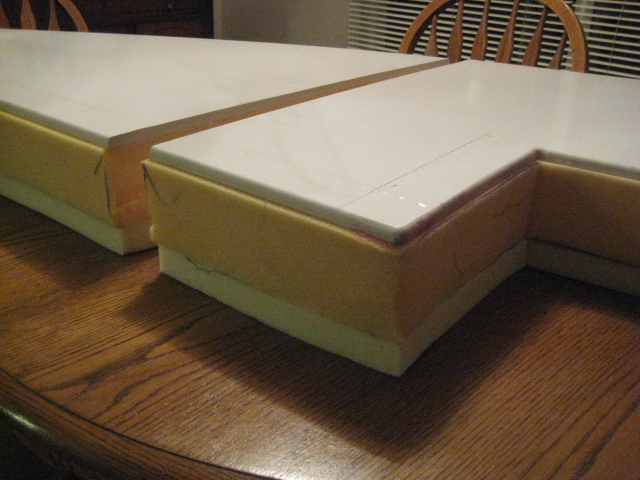
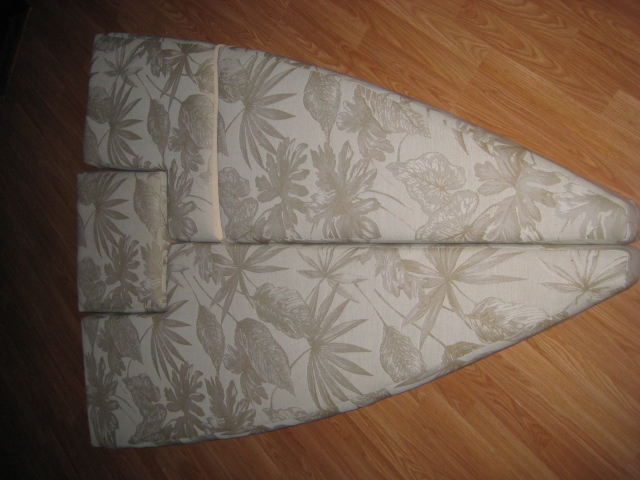
After the memory foam was on, I cut the port-side unit in two. The cut ends seem to rest nicely on the black water pump and so the ends are well supported. It was then necessary to sew material to the cut ends of the fabric. I found a sturdy, coordinated pattern for these patches and with the left-over material I covered the opening in front of the head. Now, the toilet is not showing. It was necessary to rent a carpet stapler to tack the fabric back into place. Total cost $250.
Post-use report: It's great! Good, comfortable night's sleep. My friends on the Red Current made the cuts on a diagonal from the forward corners of the toilet cushion. The diagonal cuts look nicer than mine and they did both long cushions.
The first task was to remove the upholstery from the cushion. Then I had a brilliant thought: Why not add some memory foam so that my sleep will be more comfortable (I am not the first one to have noticed that these cushions get rather hard by the end of the night)? I then removed the upholstery from all three factory-original cushions and had 1 inch of memory foam laminated onto the existing foam. Lamination is necessary so that the foam will not migrate. I will be criticized for not adding 2 inches, but I wanted to keep costs down and also retain adequate foot room in the narrow space at the bow. The lesser thickness enabled me to re-use the original fabric.
After the memory foam was on, I cut the port-side unit in two. The cut ends seem to rest nicely on the black water pump and so the ends are well supported. It was then necessary to sew material to the cut ends of the fabric. I found a sturdy, coordinated pattern for these patches and with the left-over material I covered the opening in front of the head. Now, the toilet is not showing. It was necessary to rent a carpet stapler to tack the fabric back into place. Total cost $250.
Post-use report: It's great! Good, comfortable night's sleep. My friends on the Red Current made the cuts on a diagonal from the forward corners of the toilet cushion. The diagonal cuts look nicer than mine and they did both long cushions.
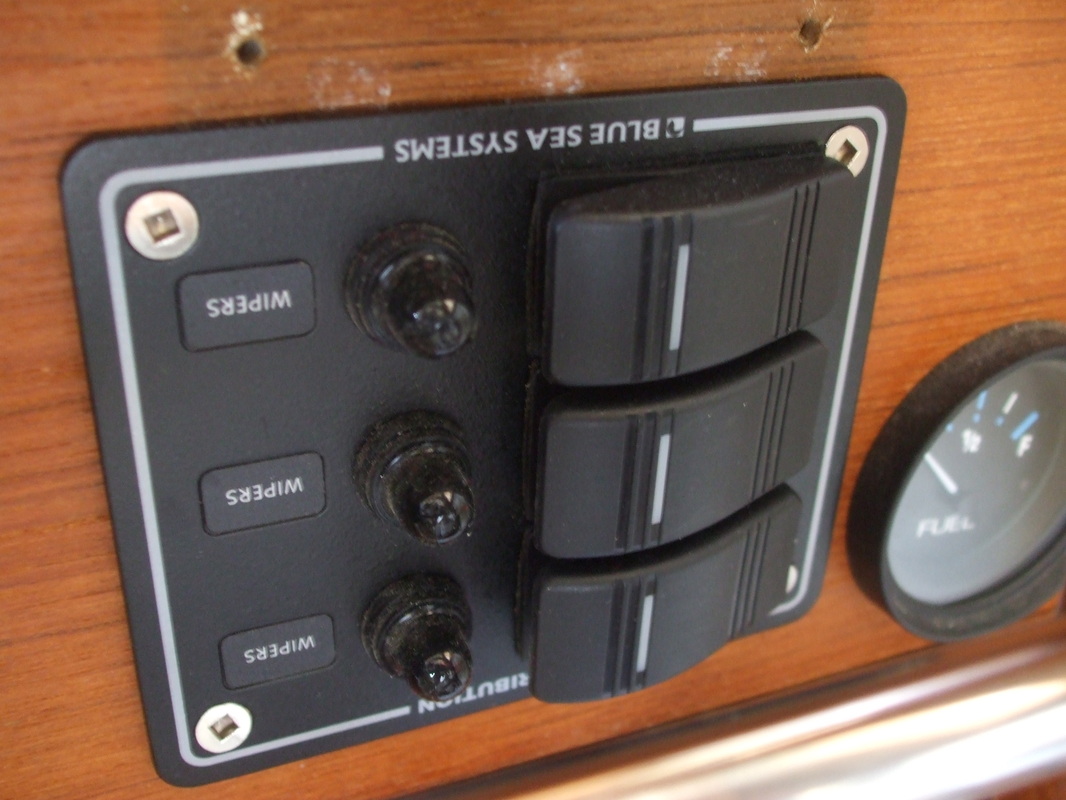
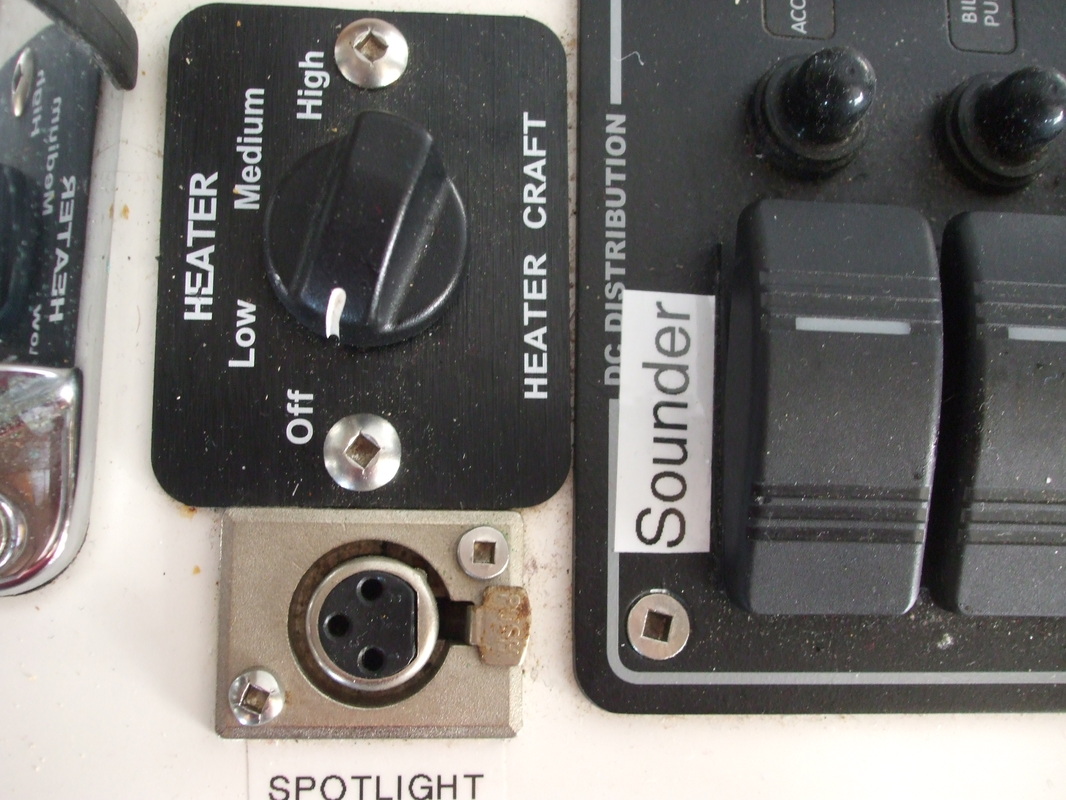
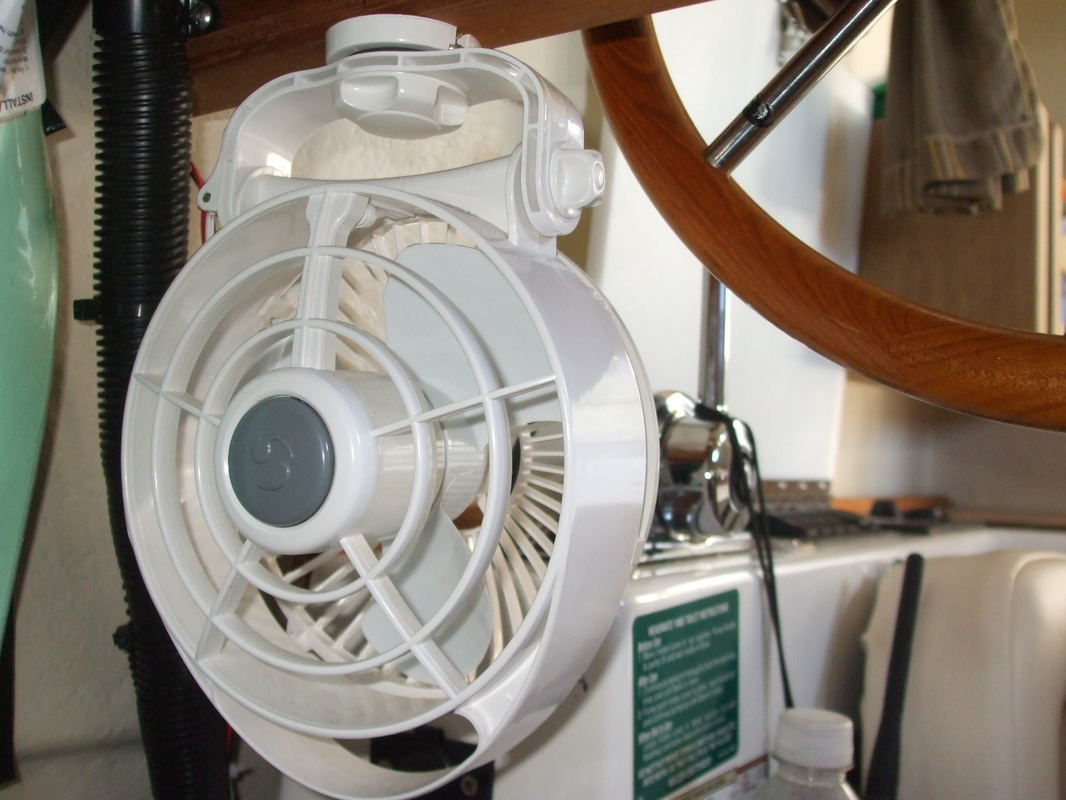
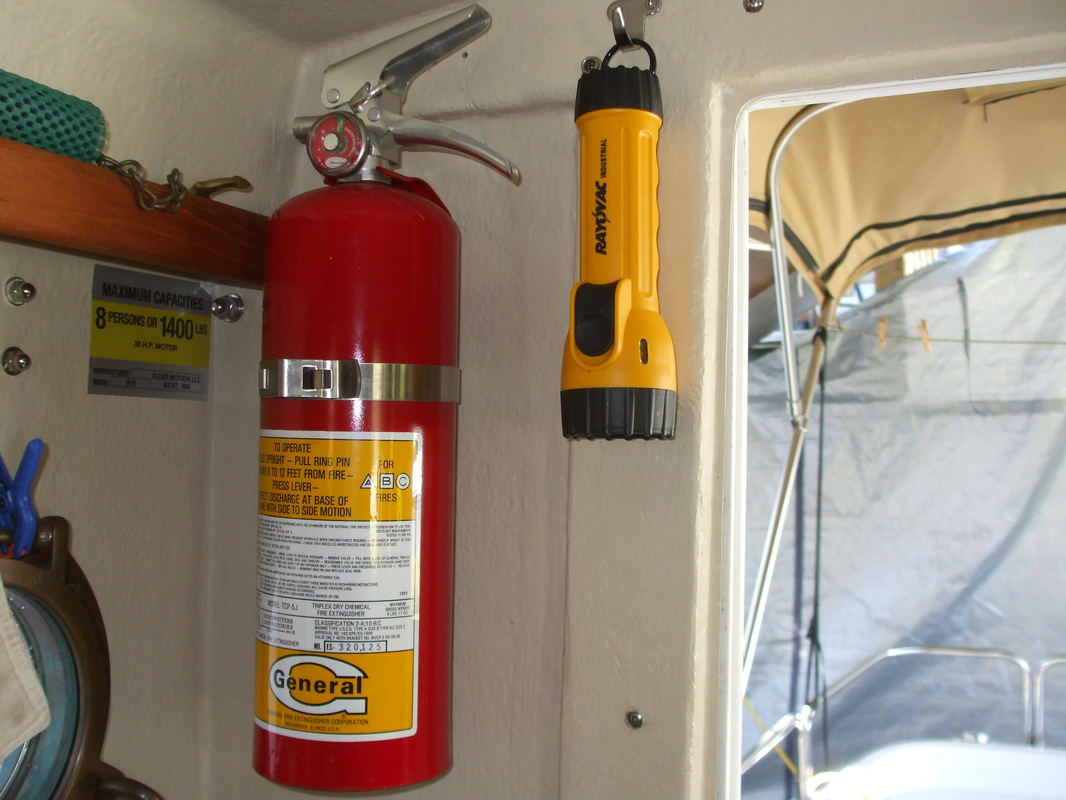
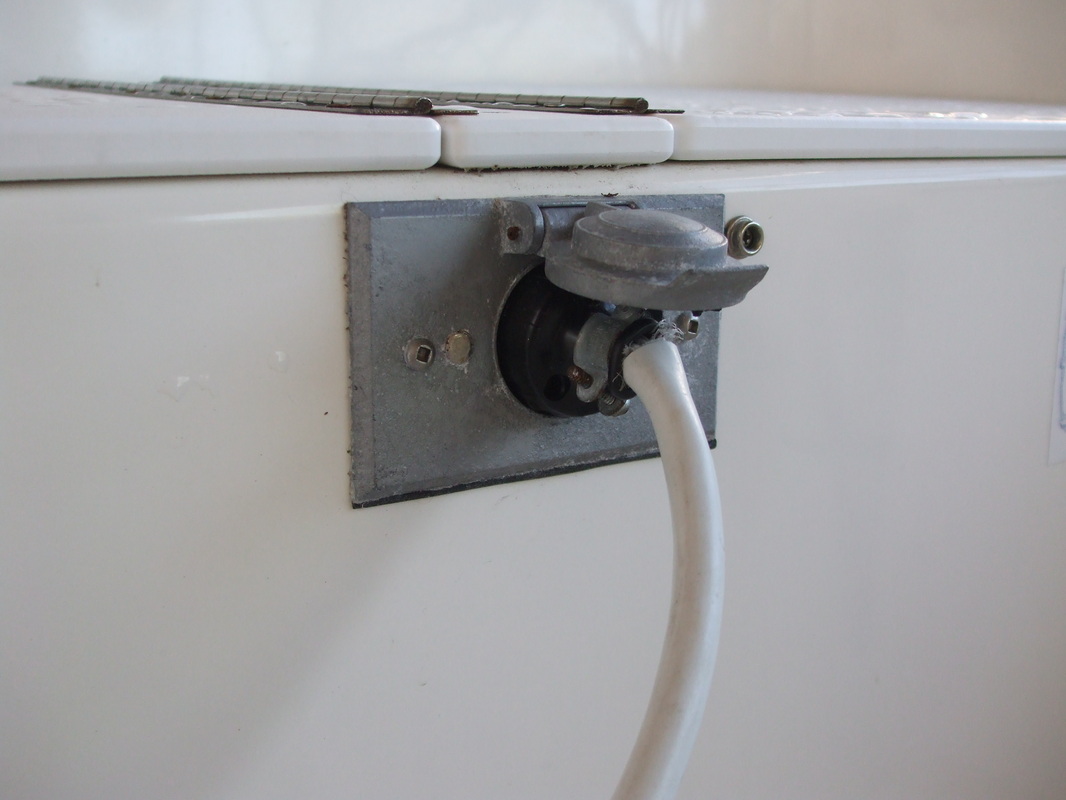
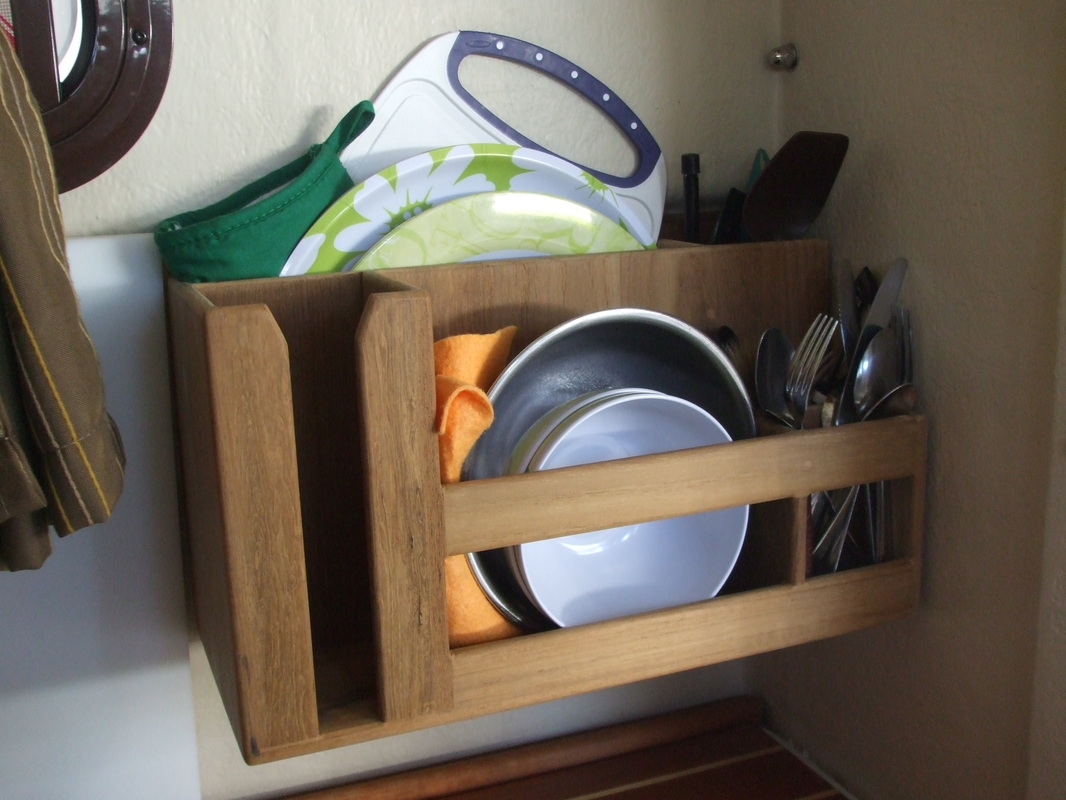
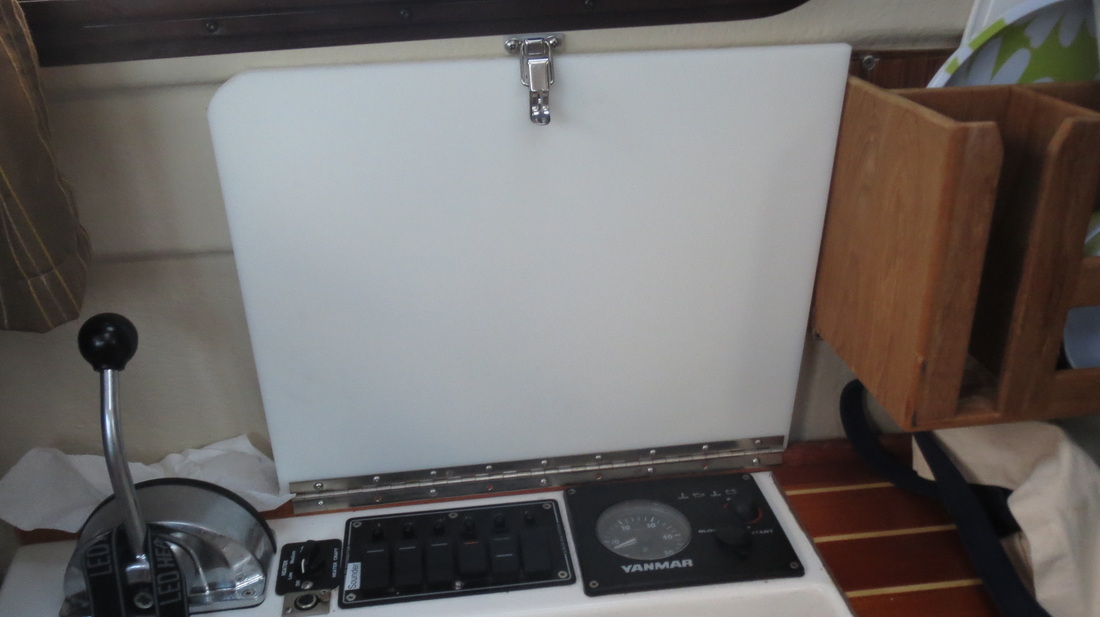
Other improvements: 1. A second sounder was installed and the display is in the hole where the spotlight control would normally go. It is wired to the "spare" switch. 2. The wiper controls were difficult to access while underway (especially in rough weather). It is too bad that they are positioned inboard from the fuel gauge. I found that by turning the complete unit 90 degrees clockwise made it easier to use the switches and required no additional cutting, but really they should be switched with the fuel gauge so that they can more easily be accessed. 3. A hand-held spotlight which plugs into a socket that I located beside the heater control. 4. A Bora 12V fan was installed forward of the wheel and the airstream can be directed into the sleeping compartment for those nights when excessive heat is being generated. LOL. It also helps with condensation and for drying things while underway. 5. I like lots of fire extinguishers. I have three installed. 6. The battery charger's extension cord was located inside the lazarette and was pinched under the lid whenever the charger was plugged in. I installed a female electrical connector on the front of the lazarette near the charger. 7. A dish rack makes china and cutlery storage neat and tidy. Before, items were inside a box which had to be rifled through to get at what was needed. Not only that, the box is hard to see into as it would be in the undersink storage compartment. This led to installation of lighting in the compartment. Power was accessed from the sink water pump wiring which means that it will only work when the pump is energized. 8. I "dammed" the rain gutters and inserted a copper tube (old toilet tank supply tube) to allow rainwater to drain away into the scuppers instead of the cockpit. Tubing can be attached to the ends to collect rainwater for extended cruising. 9. A cutting board was added by simply attaching it with piano hinge to the wood trim by the engine controls. A clip holds it stowed for when the boat is underway and I now have more surface for food preparation.


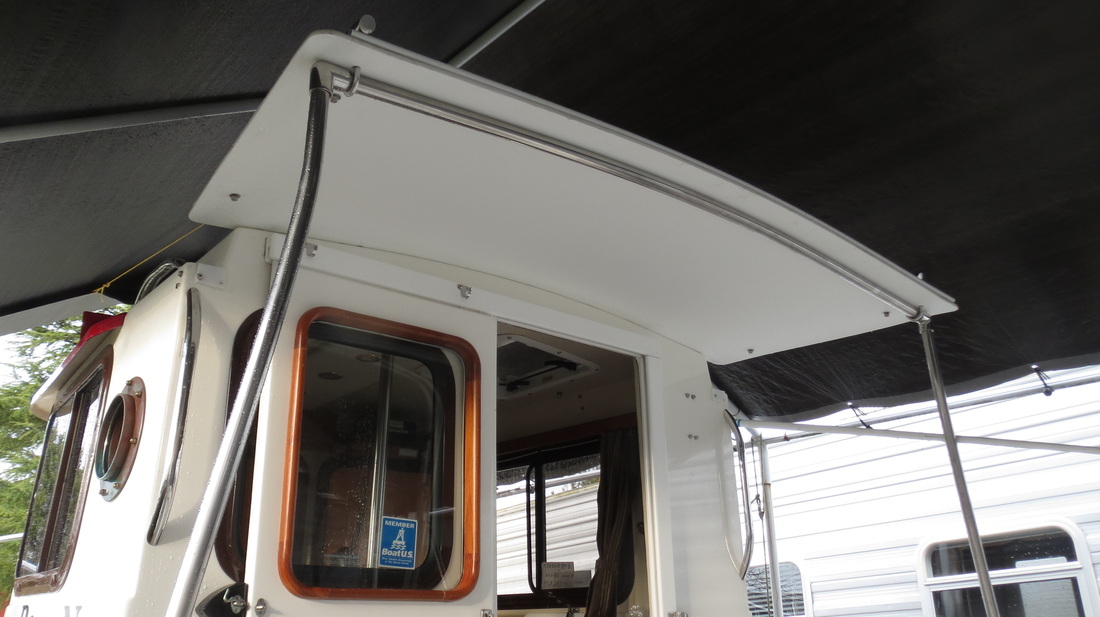
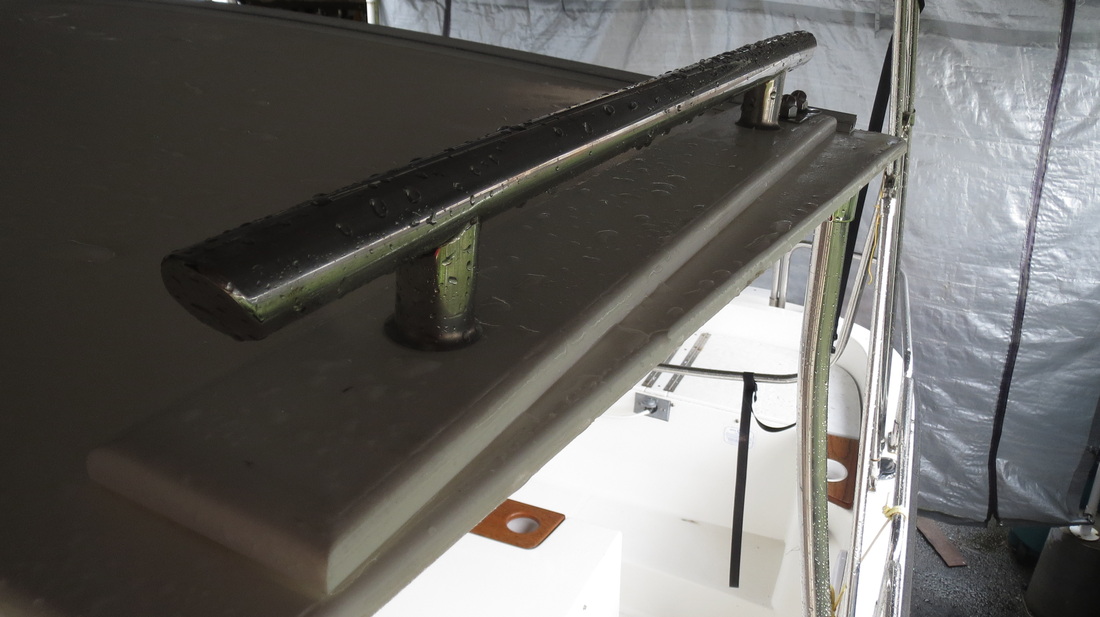
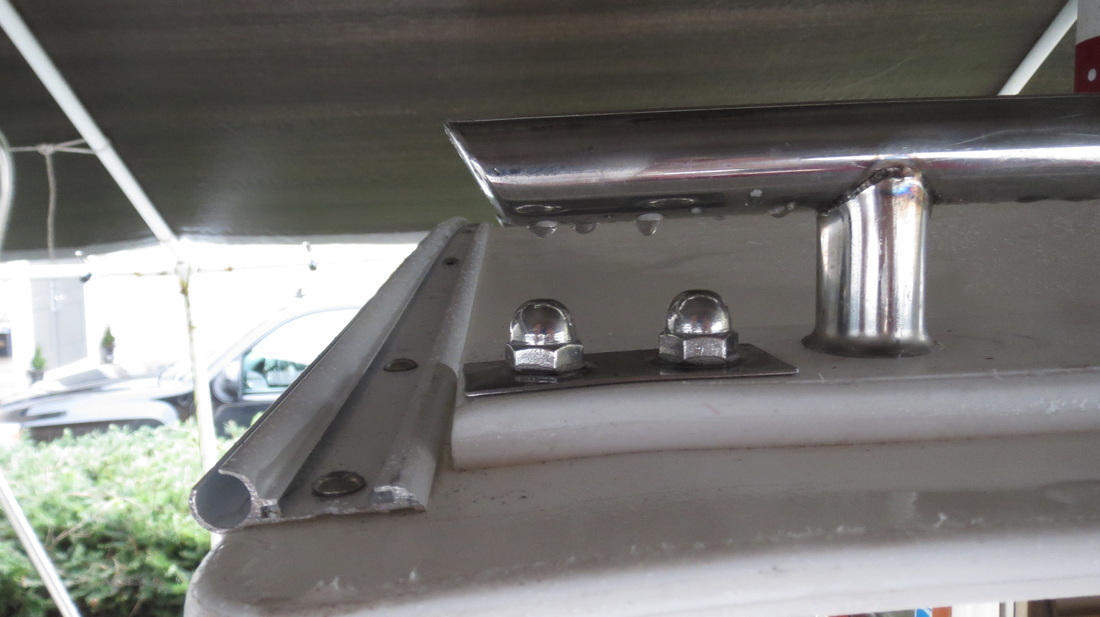
Cockpit Enclosure Project (in progress)
The first job was to make a hard top extending back from the wheel house. Atop, I installed two "horned" grab rails to facilitate tying down objects. The factory bimini attaches to the trailing edge of this new hardtop and will now provide coverage for the length of the cockpit. Everything is very sturdy. Perhaps in future I will start work (or someone will) on side walls and a rear panel to enclose the cockpit. The final photo shows my friends' boat (Red Current) showcasing the modification that I would like to make.

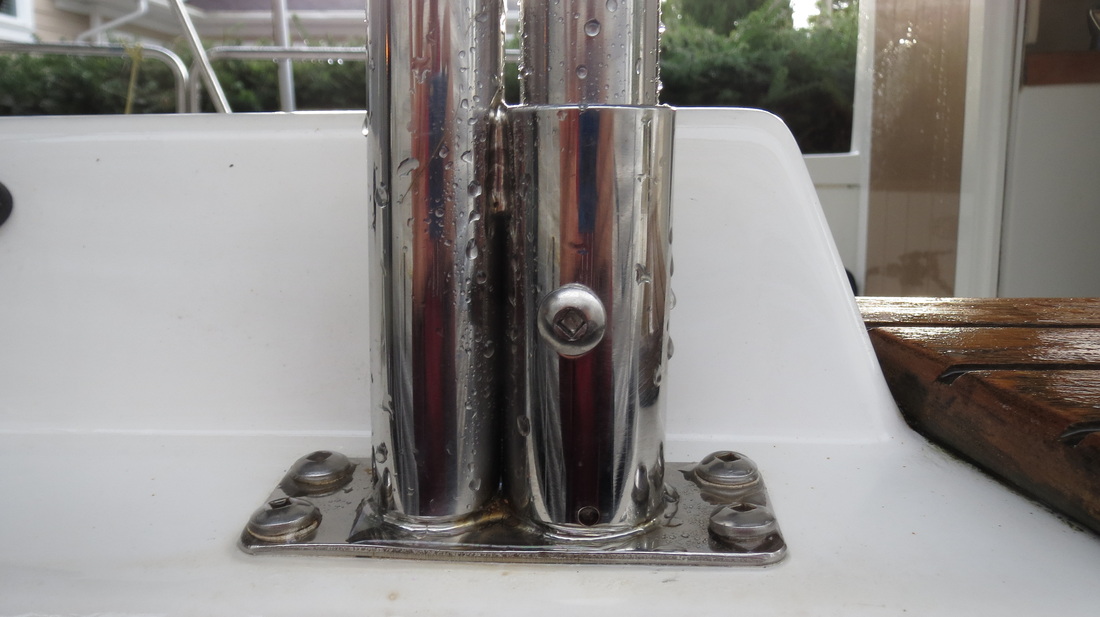

Davit for dinghy outboard
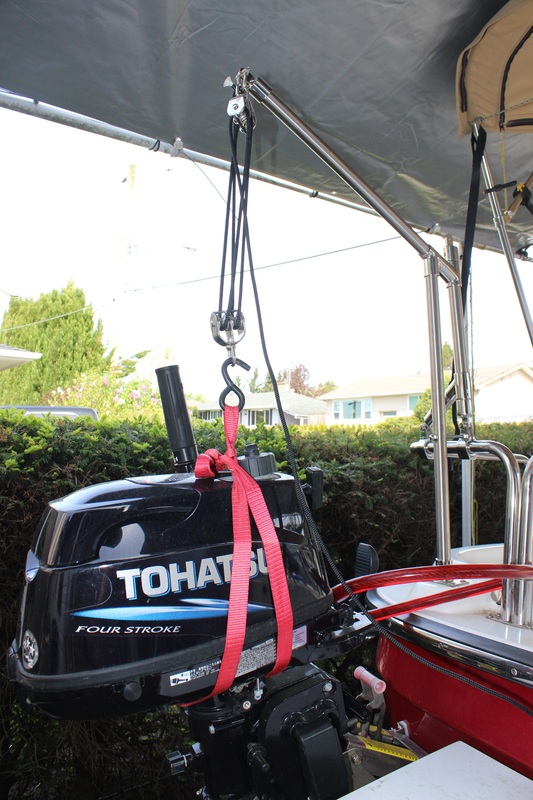
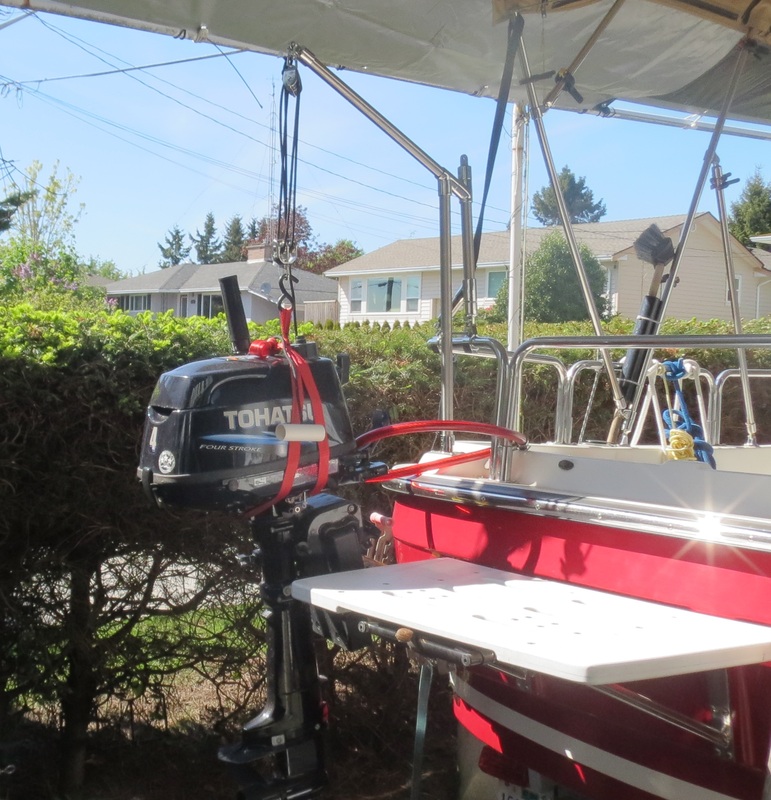
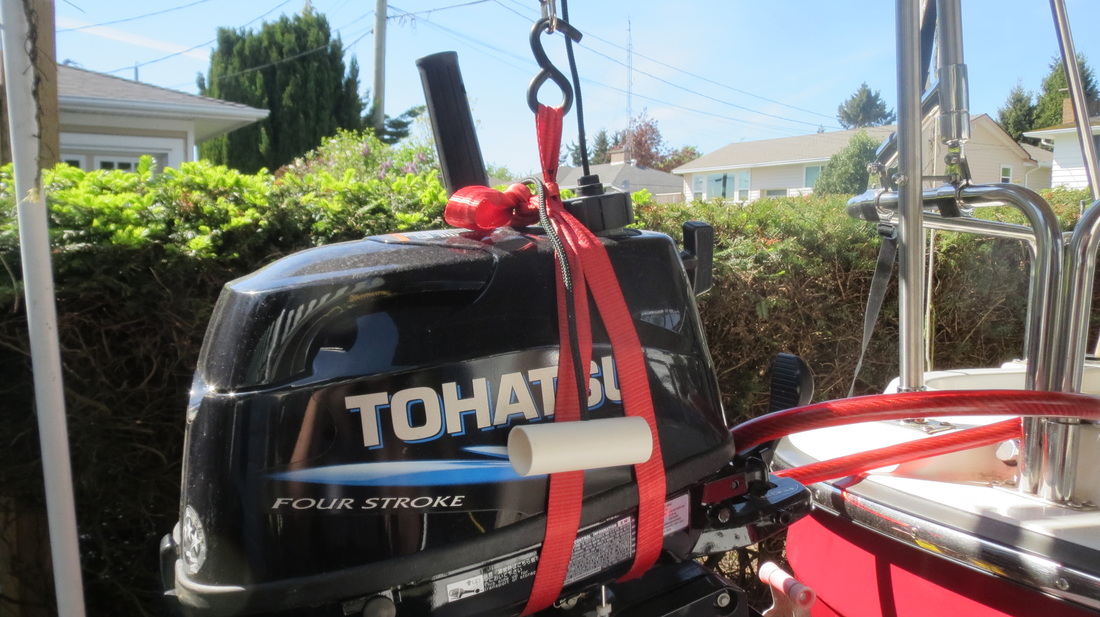
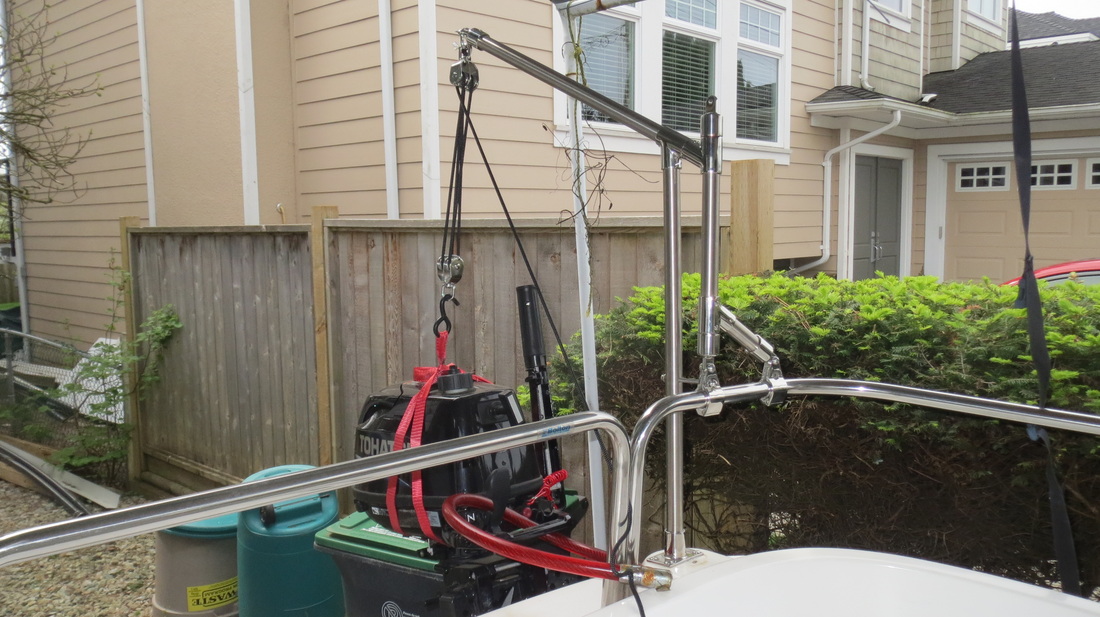
No matter how much I braced myself, transferring the outboard from its bracket to the dinghy and back again was a test of that day's luck quotient. I determined that there must be a way to build a davit for the outboard and this is what all the head scratching came up with. It cost about $150. It works quite well. Why all the trouble? I hate towing the dinghy and prefer to bring it aboard onto the engine box when underway, which means the outboard must be removed first.
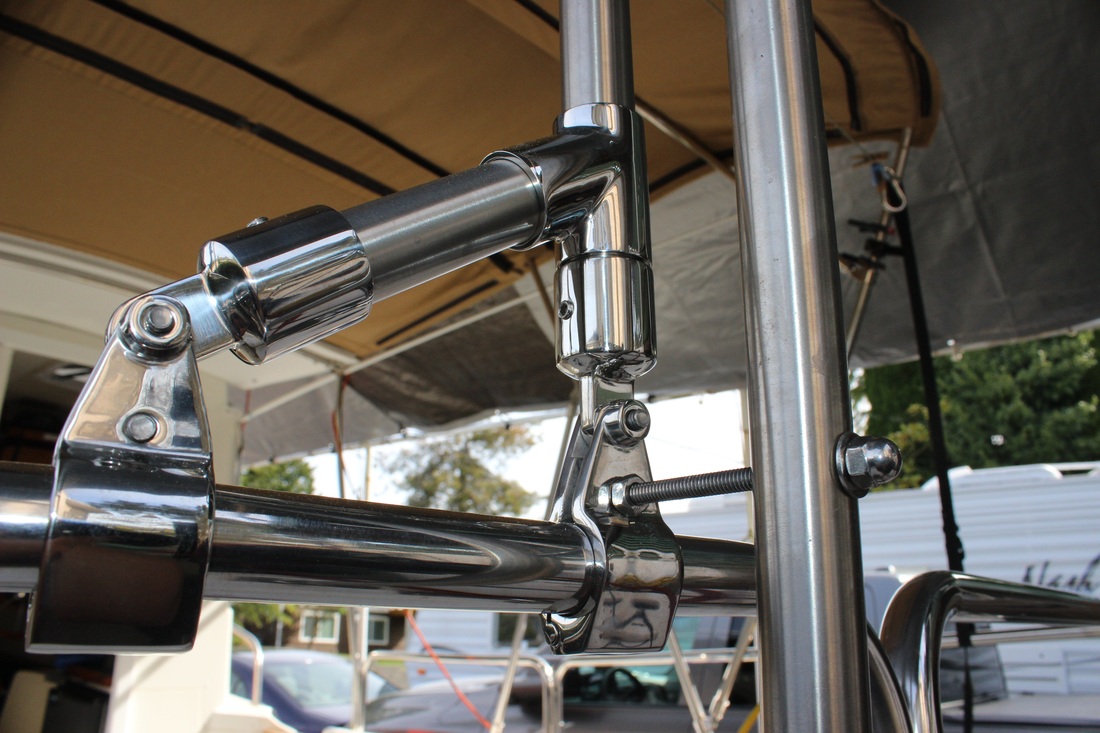
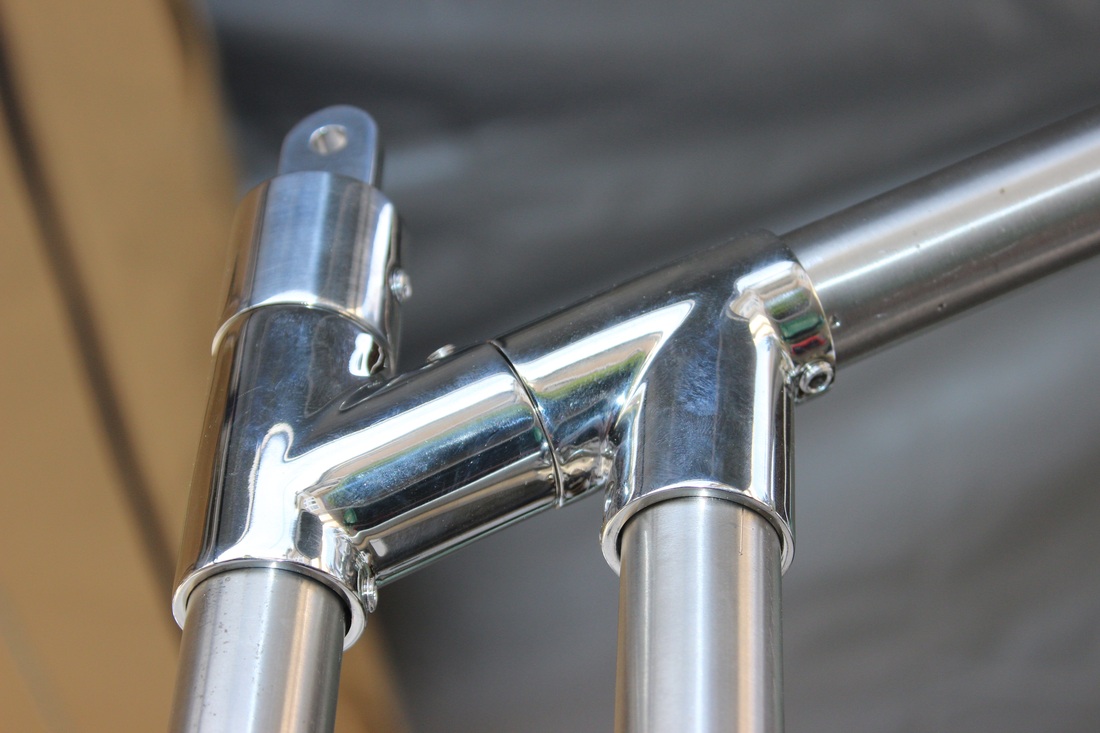
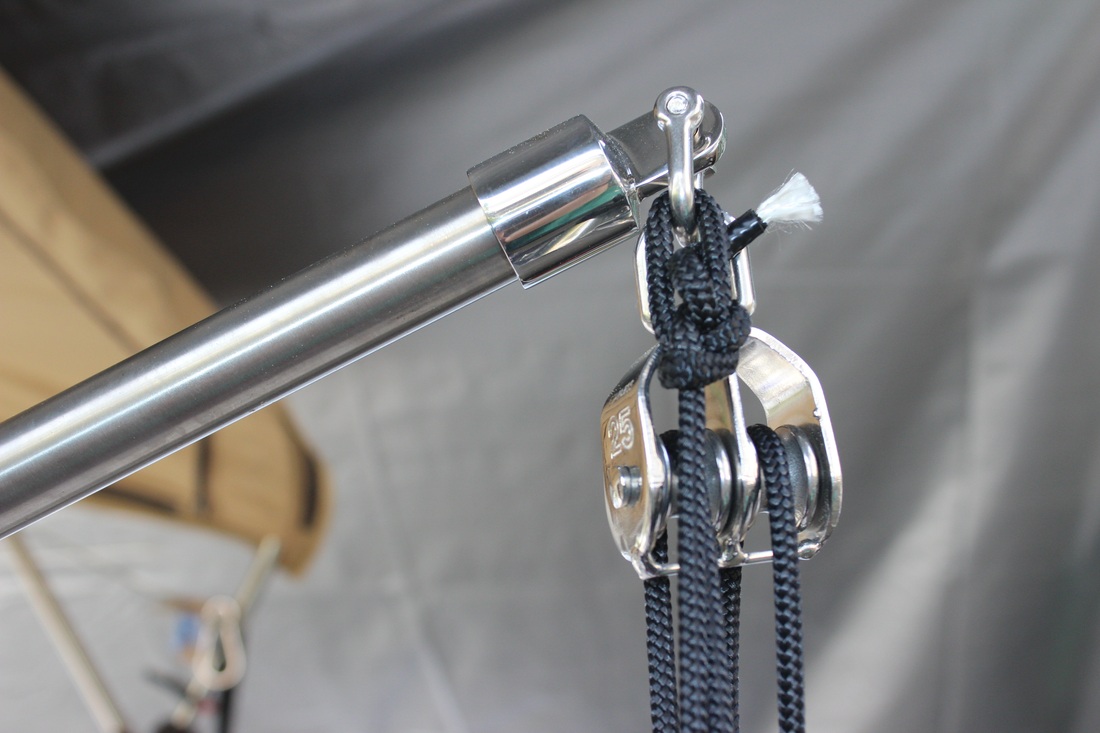
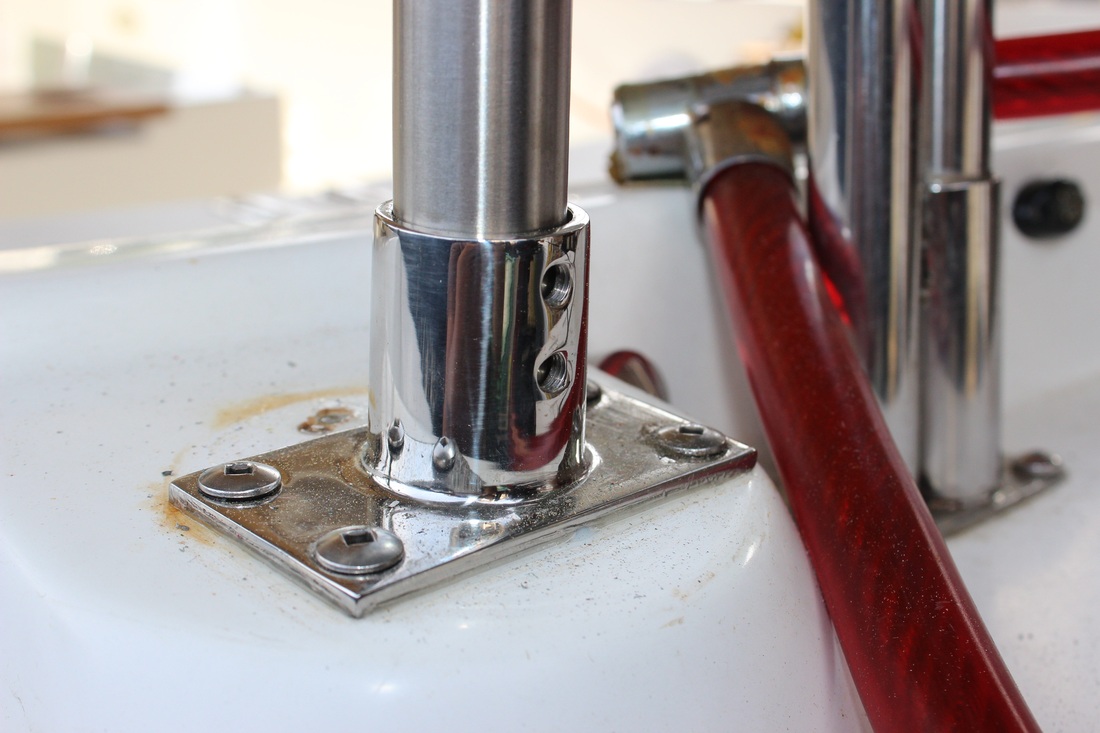
First, I used the fiberglass node on the stern (where the flagpole bracket sits) as my anchoring point. From the tube receiver installed there, I used 1" tubing as a mast and connected it to a second (angled) piece with a T connector: the boom. From the end of the boom, the double-pulley system is suspended. Of course, there would be no strength to hold the weight of the outboard plus the lifting force. Under 100 pounds, in my case. So, I used the stern railing to anchor a second and parallel upright. This one is tied to the mast at two points: the lower with 1/4 inch threaded rod and the upper with a T connector via the boom. For lateral support, I T'd a short piece of tube to the stern railing.
First, I used the fiberglass node on the stern (where the flagpole bracket sits) as my anchoring point. From the tube receiver installed there, I used 1" tubing as a mast and connected it to a second (angled) piece with a T connector: the boom. From the end of the boom, the double-pulley system is suspended. Of course, there would be no strength to hold the weight of the outboard plus the lifting force. Under 100 pounds, in my case. So, I used the stern railing to anchor a second and parallel upright. This one is tied to the mast at two points: the lower with 1/4 inch threaded rod and the upper with a T connector via the boom. For lateral support, I T'd a short piece of tube to the stern railing.